

1. How to swap tokens on Jumper
Jumper lets you swap tokens on the same chain or across different chains — for example, USDC on Arbitrum to SOL. The only requirement is that liquidity exists on a supported bridge or DEX for your token pair.Select your source chain and asset.
Select your destination chain and asset.
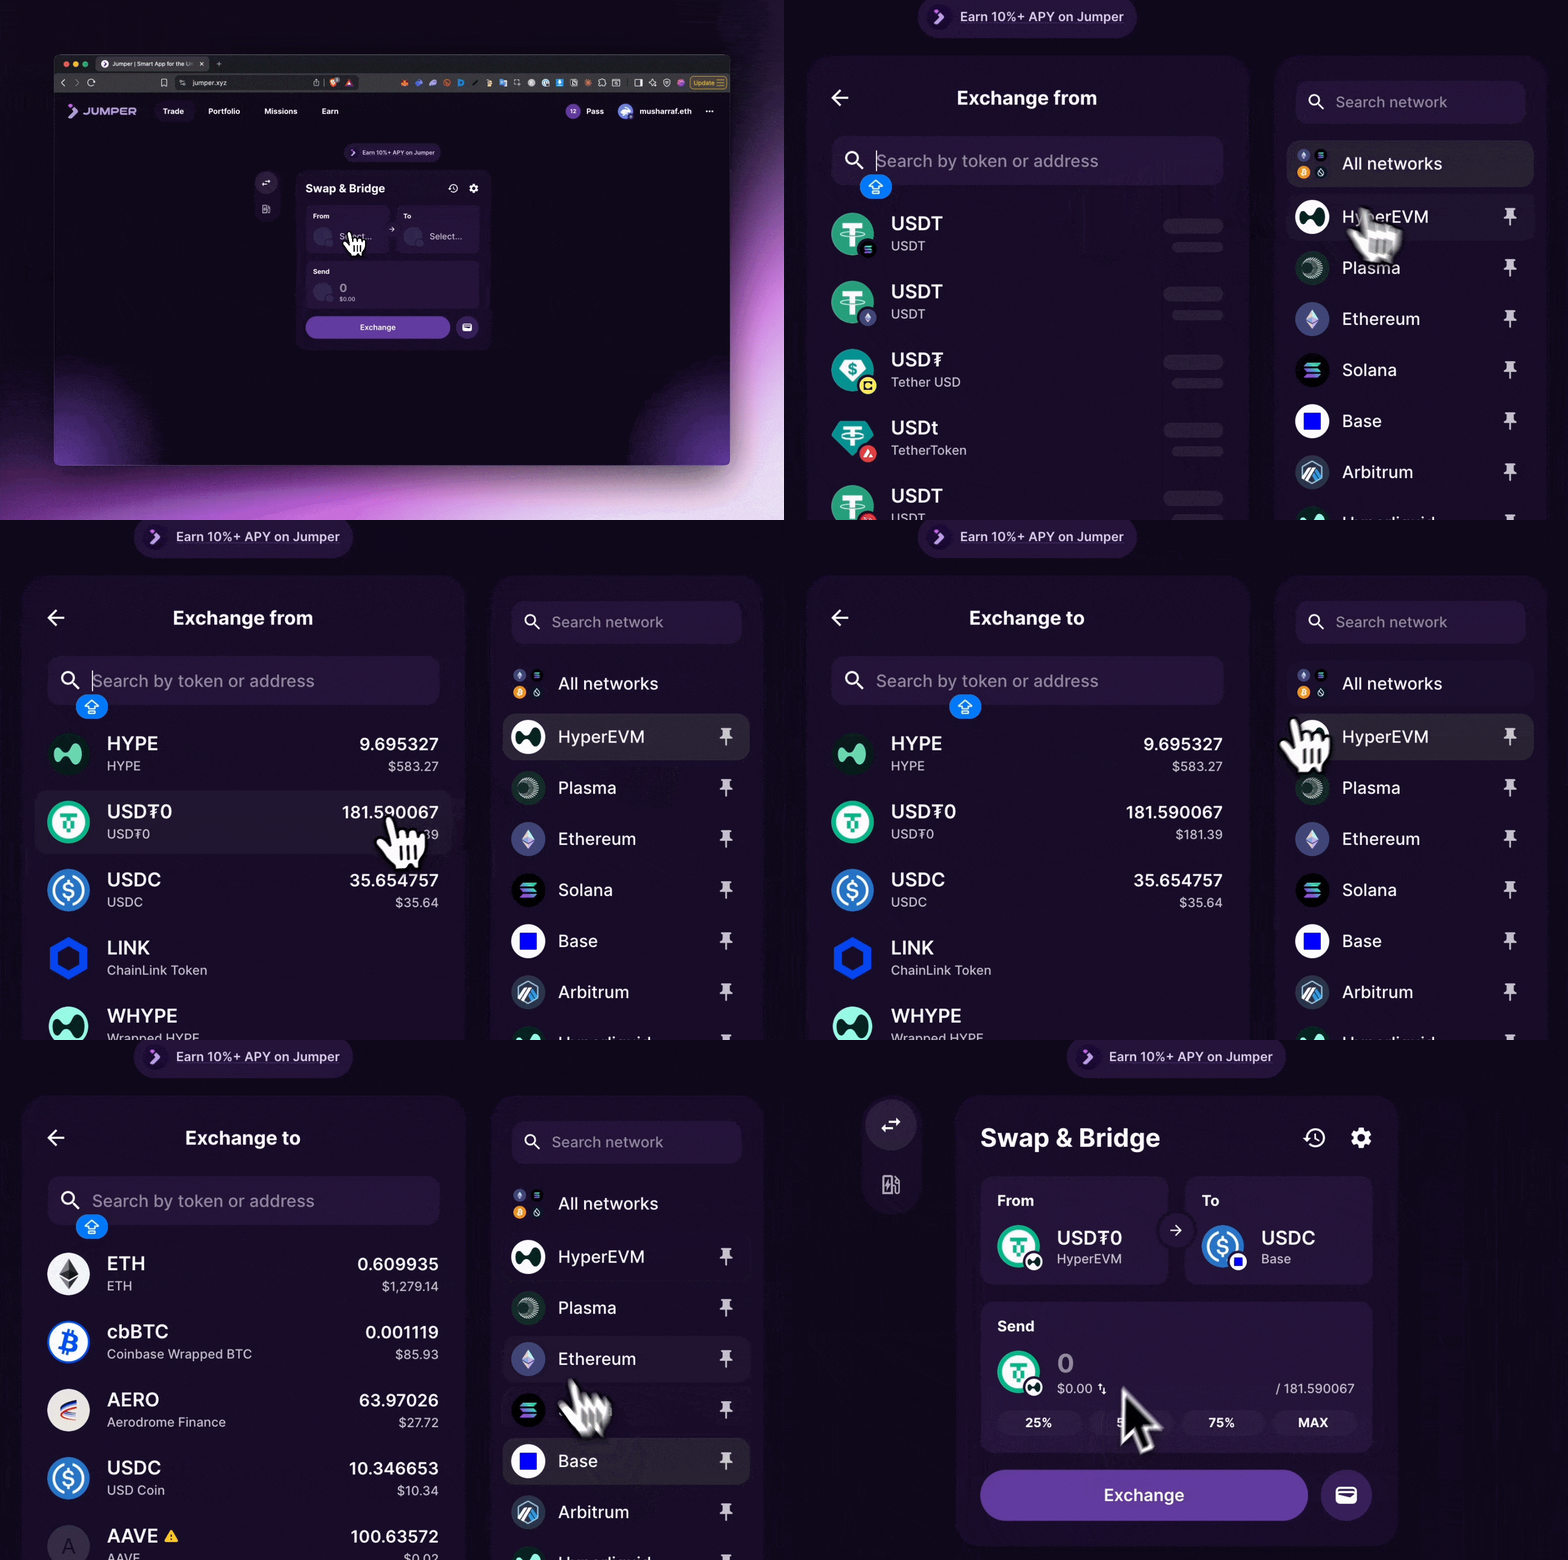
Enter the amount you want to swap or bridge.
Pick a route that you prefer to use.
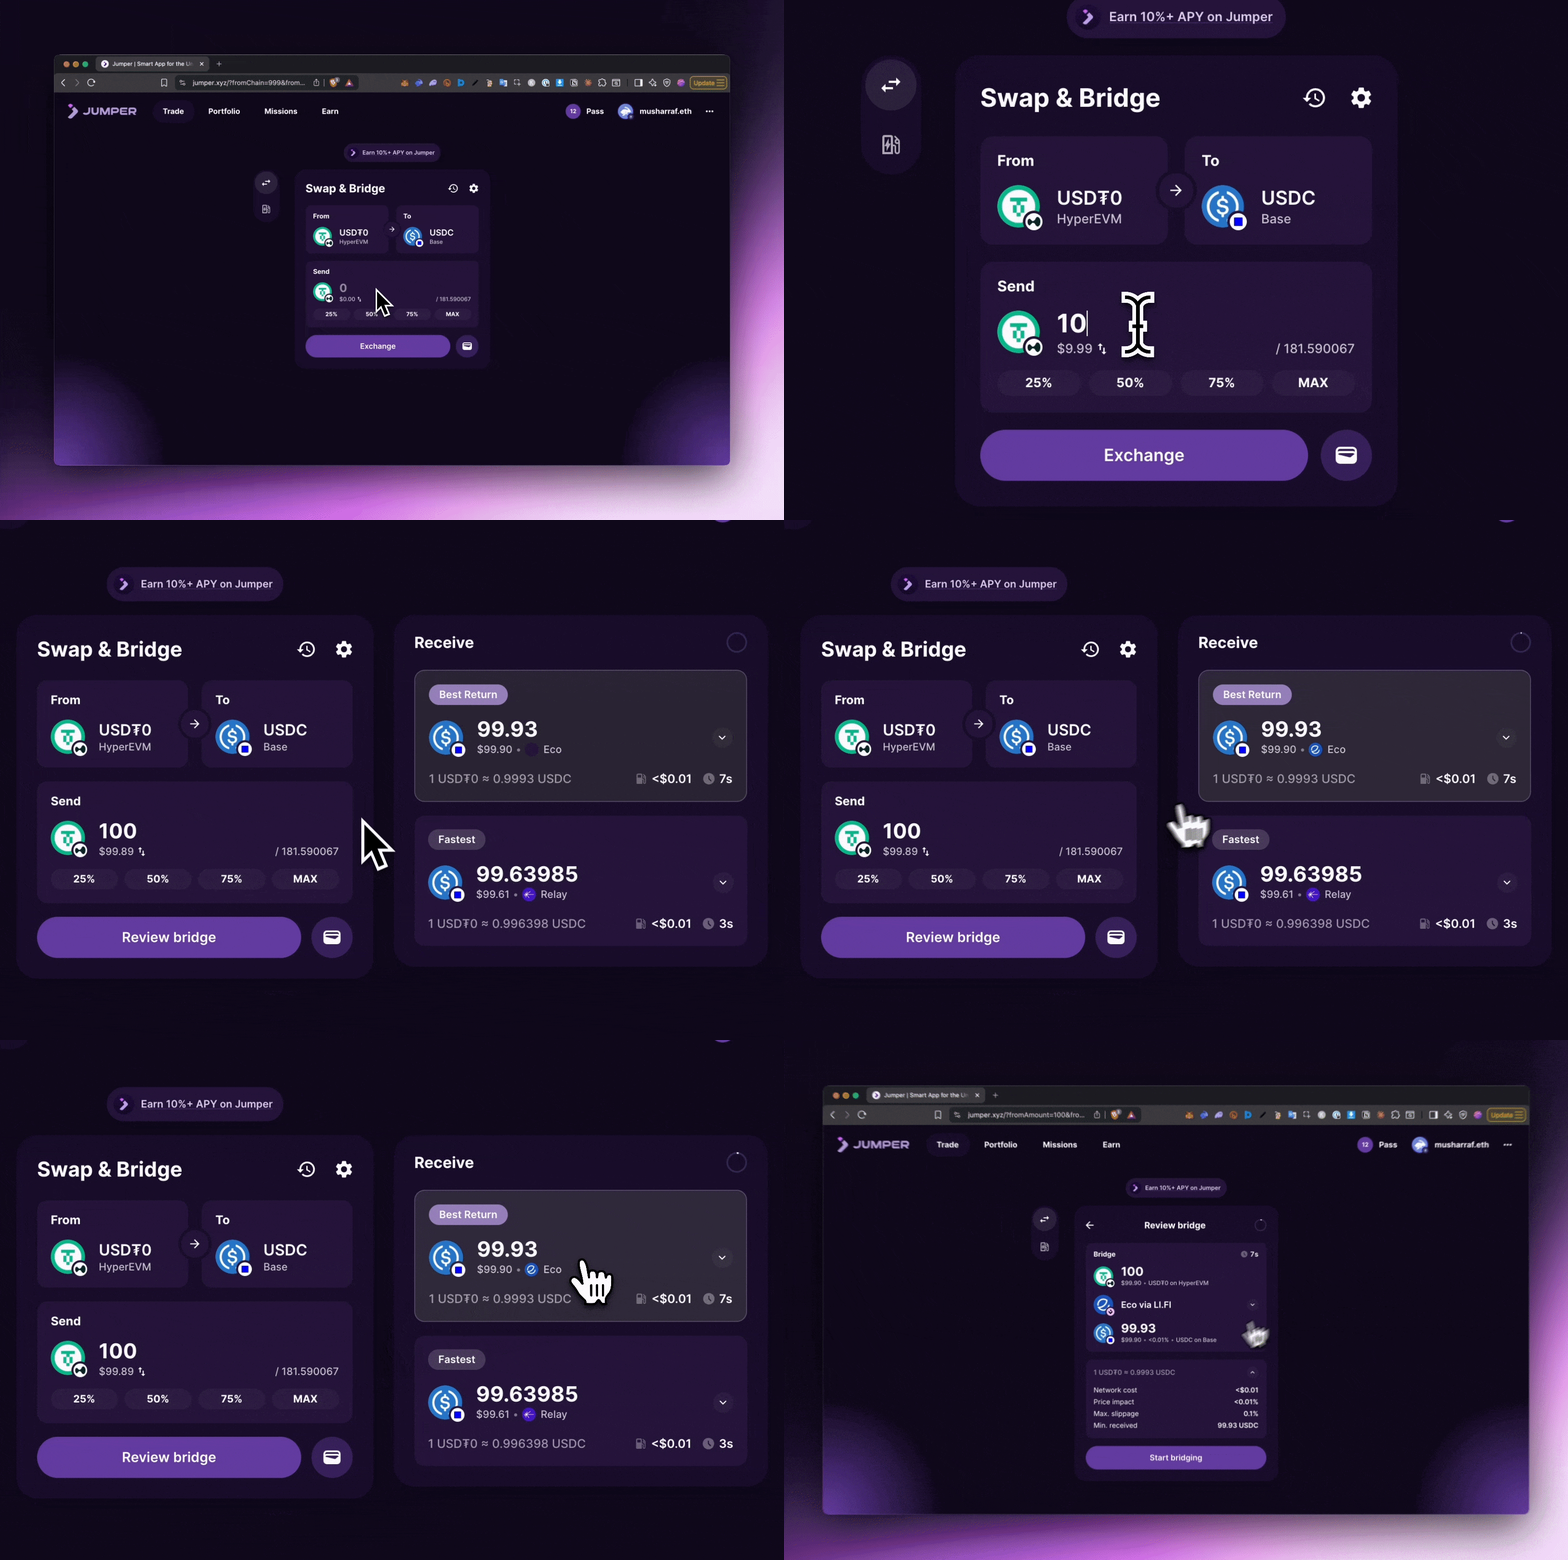
Review the quote details, including receiving amount, fees, slippage etc. If it looks good, click Start bridging.
Confirm token approval and transaction in your wallet.
2. How to change the receiving address
By default, Jumper sends funds to the wallet that started the swap. If you’re bridging to a non-EVM chain, you’ll need to paste an address that supports that network. To send funds to a different wallet, click the wallet icon next to the Exchange button.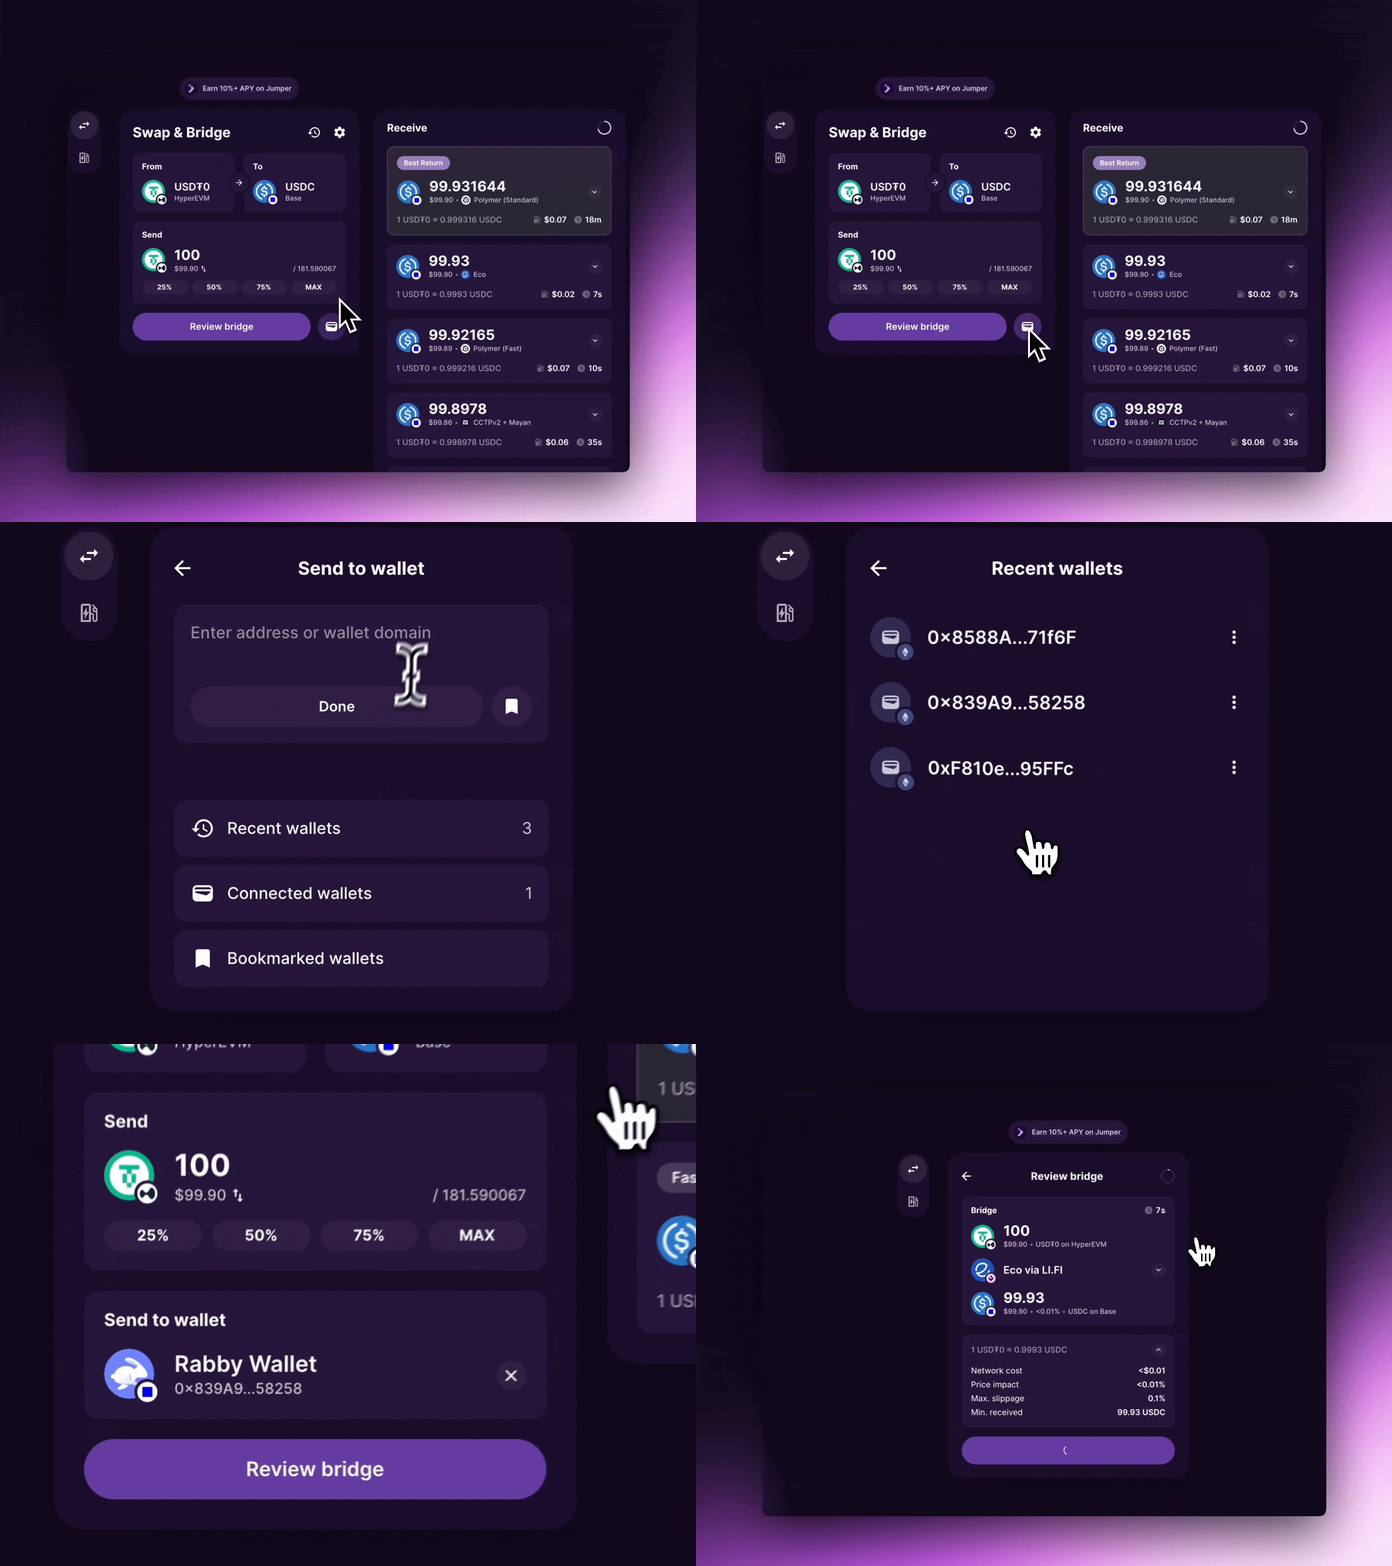
3. How to find your transaction details
After your transaction completes, click the link button in the swap overview to open Jumper Scan with your transaction details.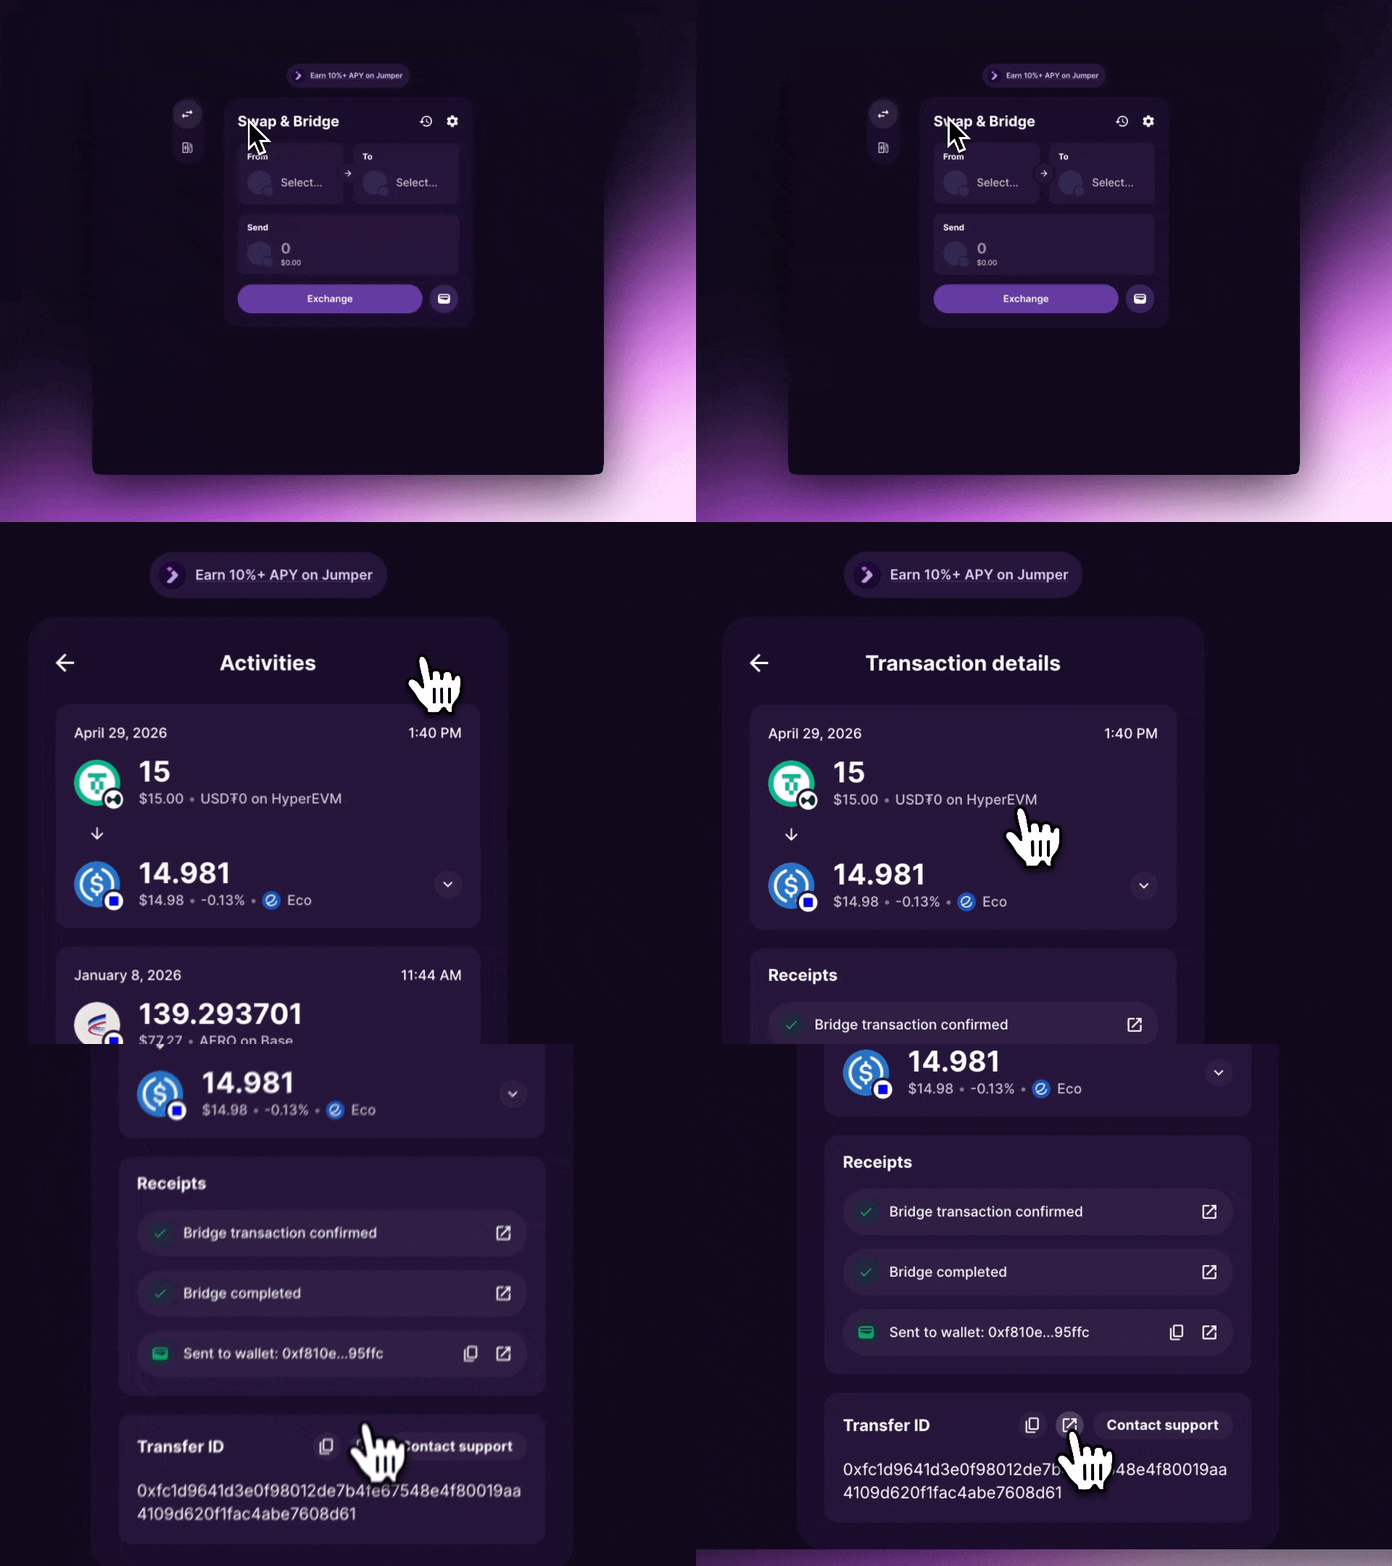
4. How to reach user support on Jumper
Click the menu button next to your connected wallet, then select Support.
Click Contact Support to open a ticket with a Jumper support team member.
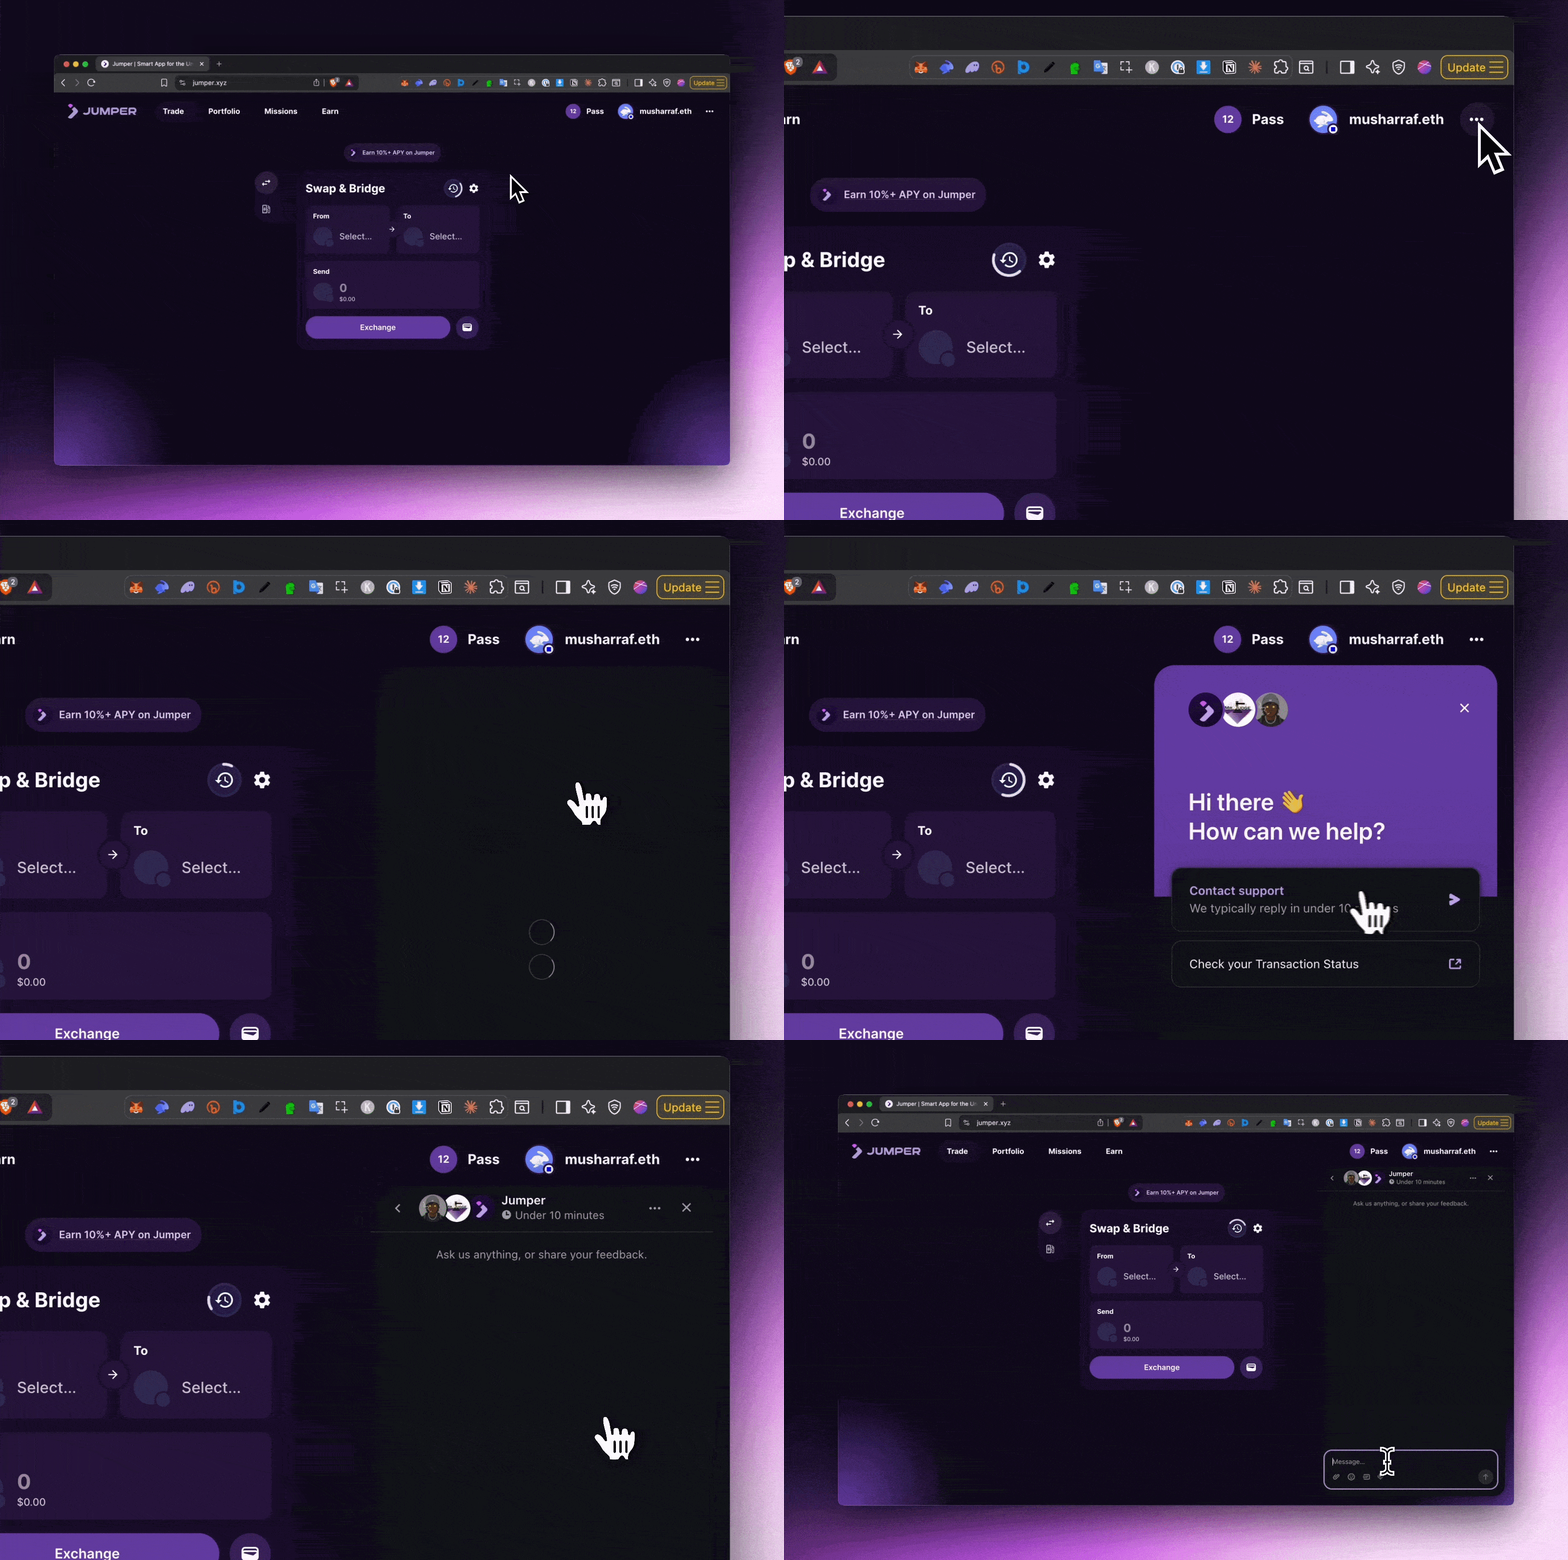
For the fastest resolution, make sure to include important details in your message.
- Your wallet address
- Origin and destination chain,
- Transaction hash or ID
- A brief description of the issue (screenshots help).
5. How to deposit into a yield opportunity on Jumper Earn
Browse opportunities
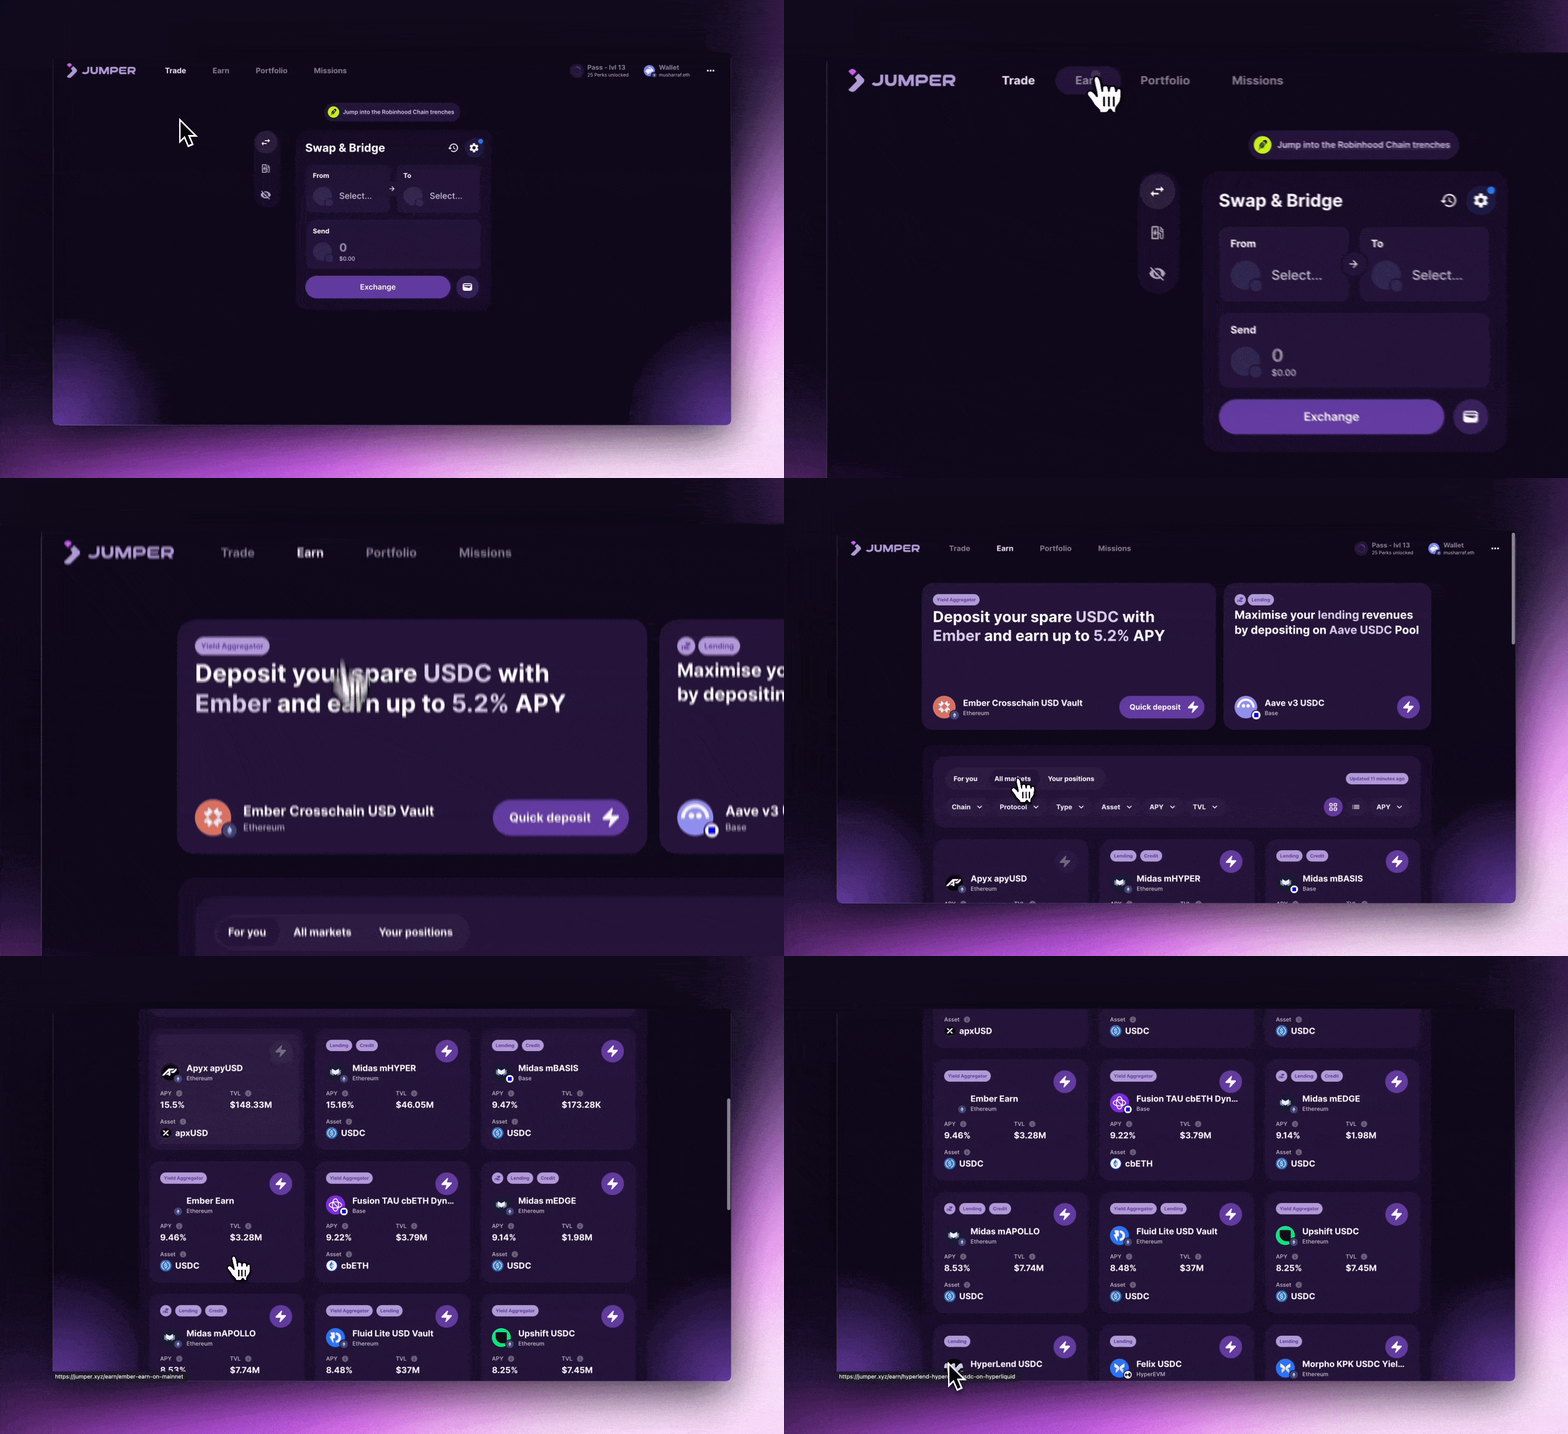
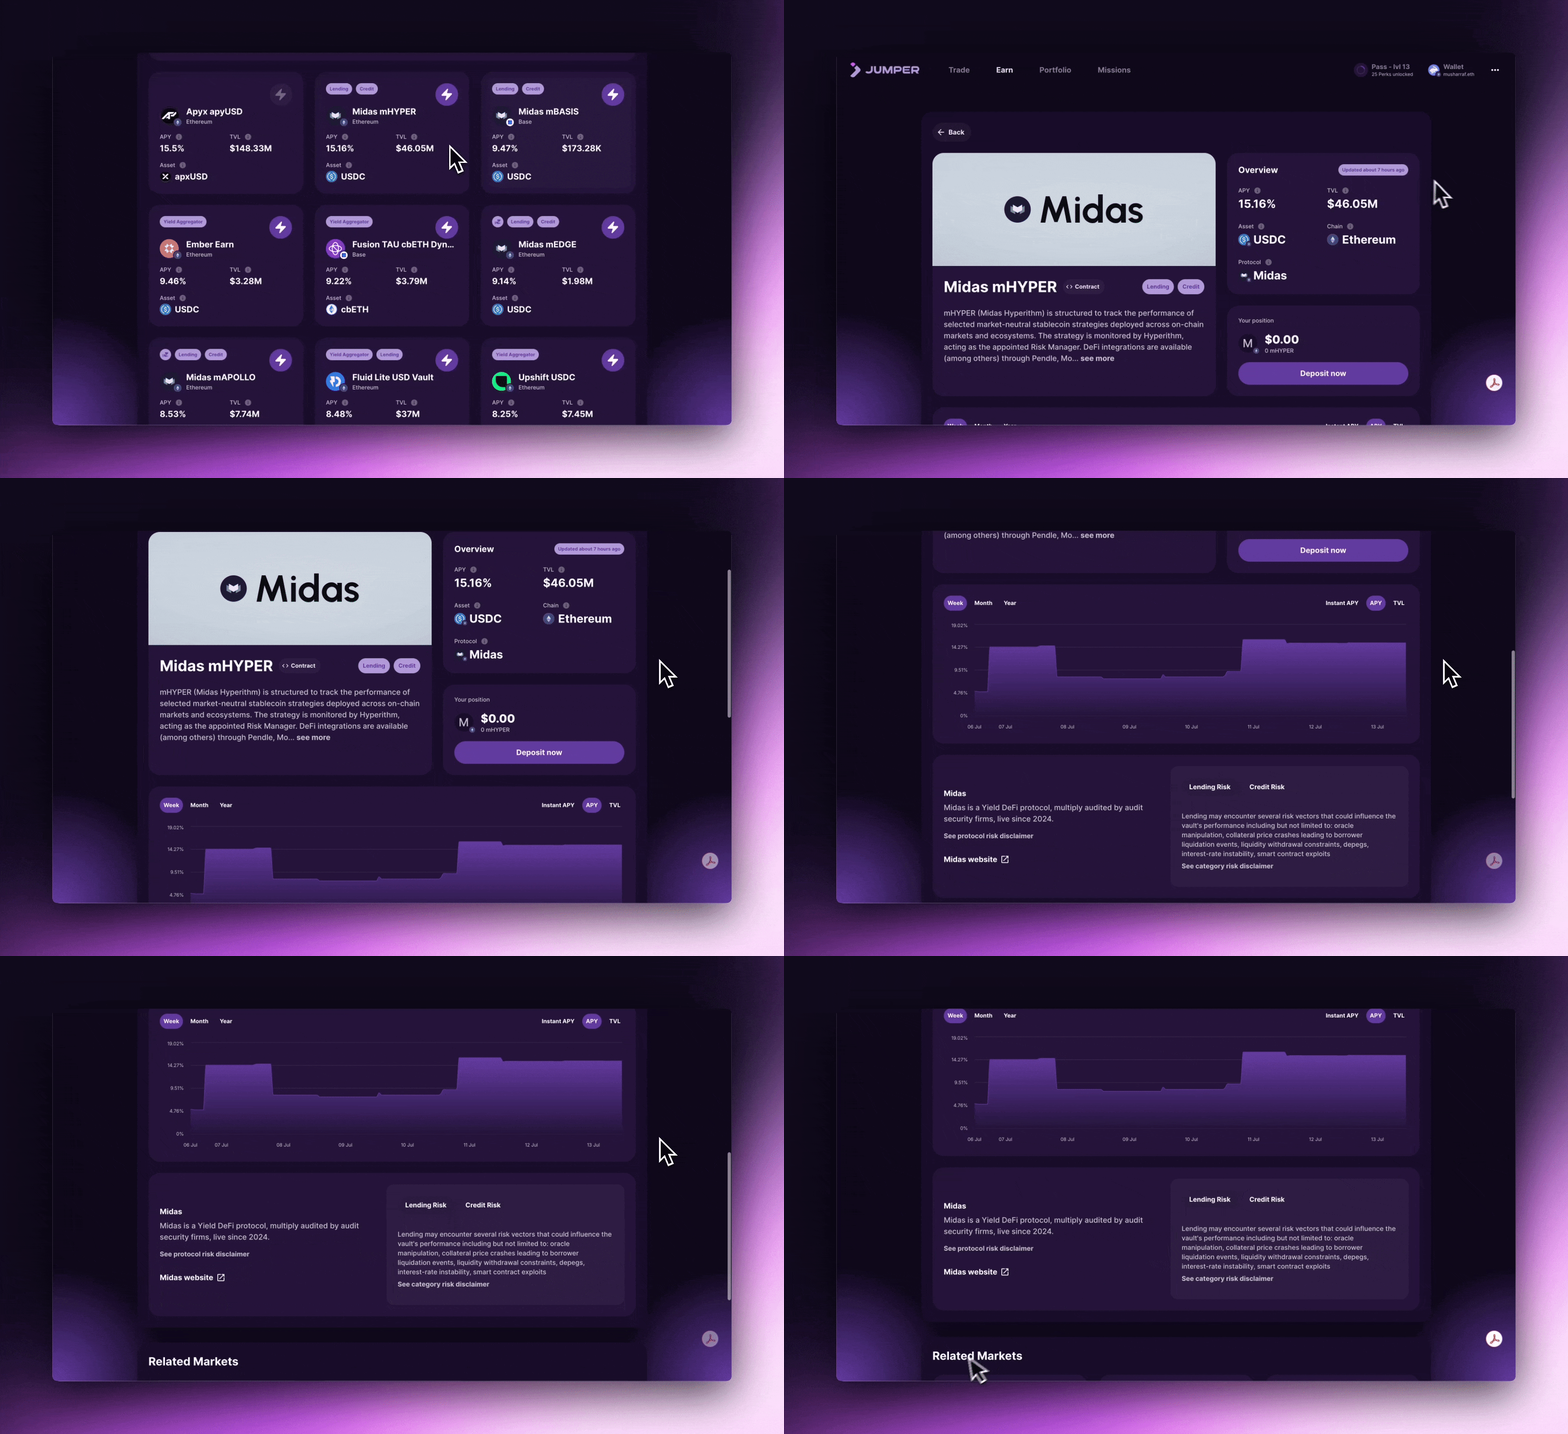
View opportunity details
Quick Deposit

6. How to manage DeFi positions on Jumper
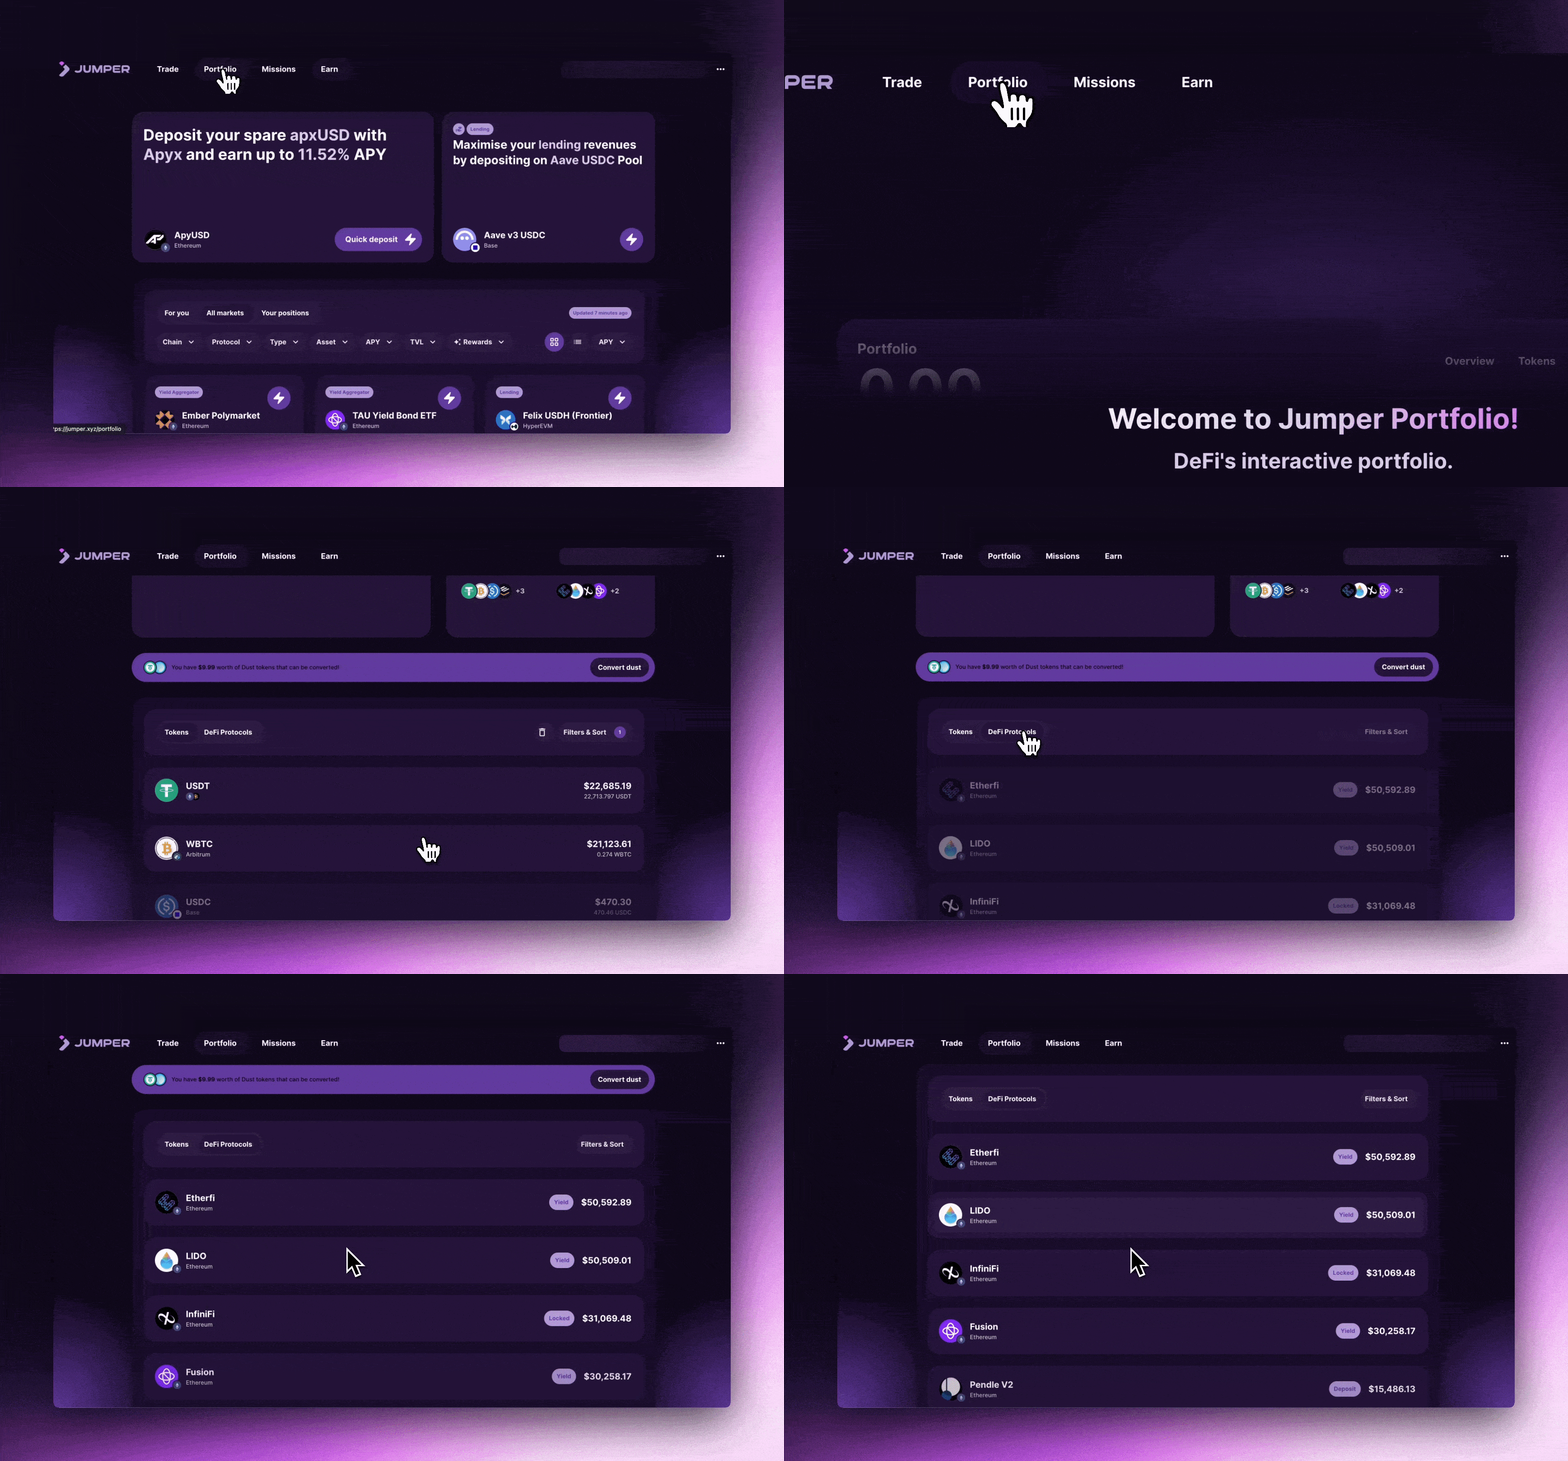
Where to find your positions You can view active positions in two places:- Your Positions section on the Earn page
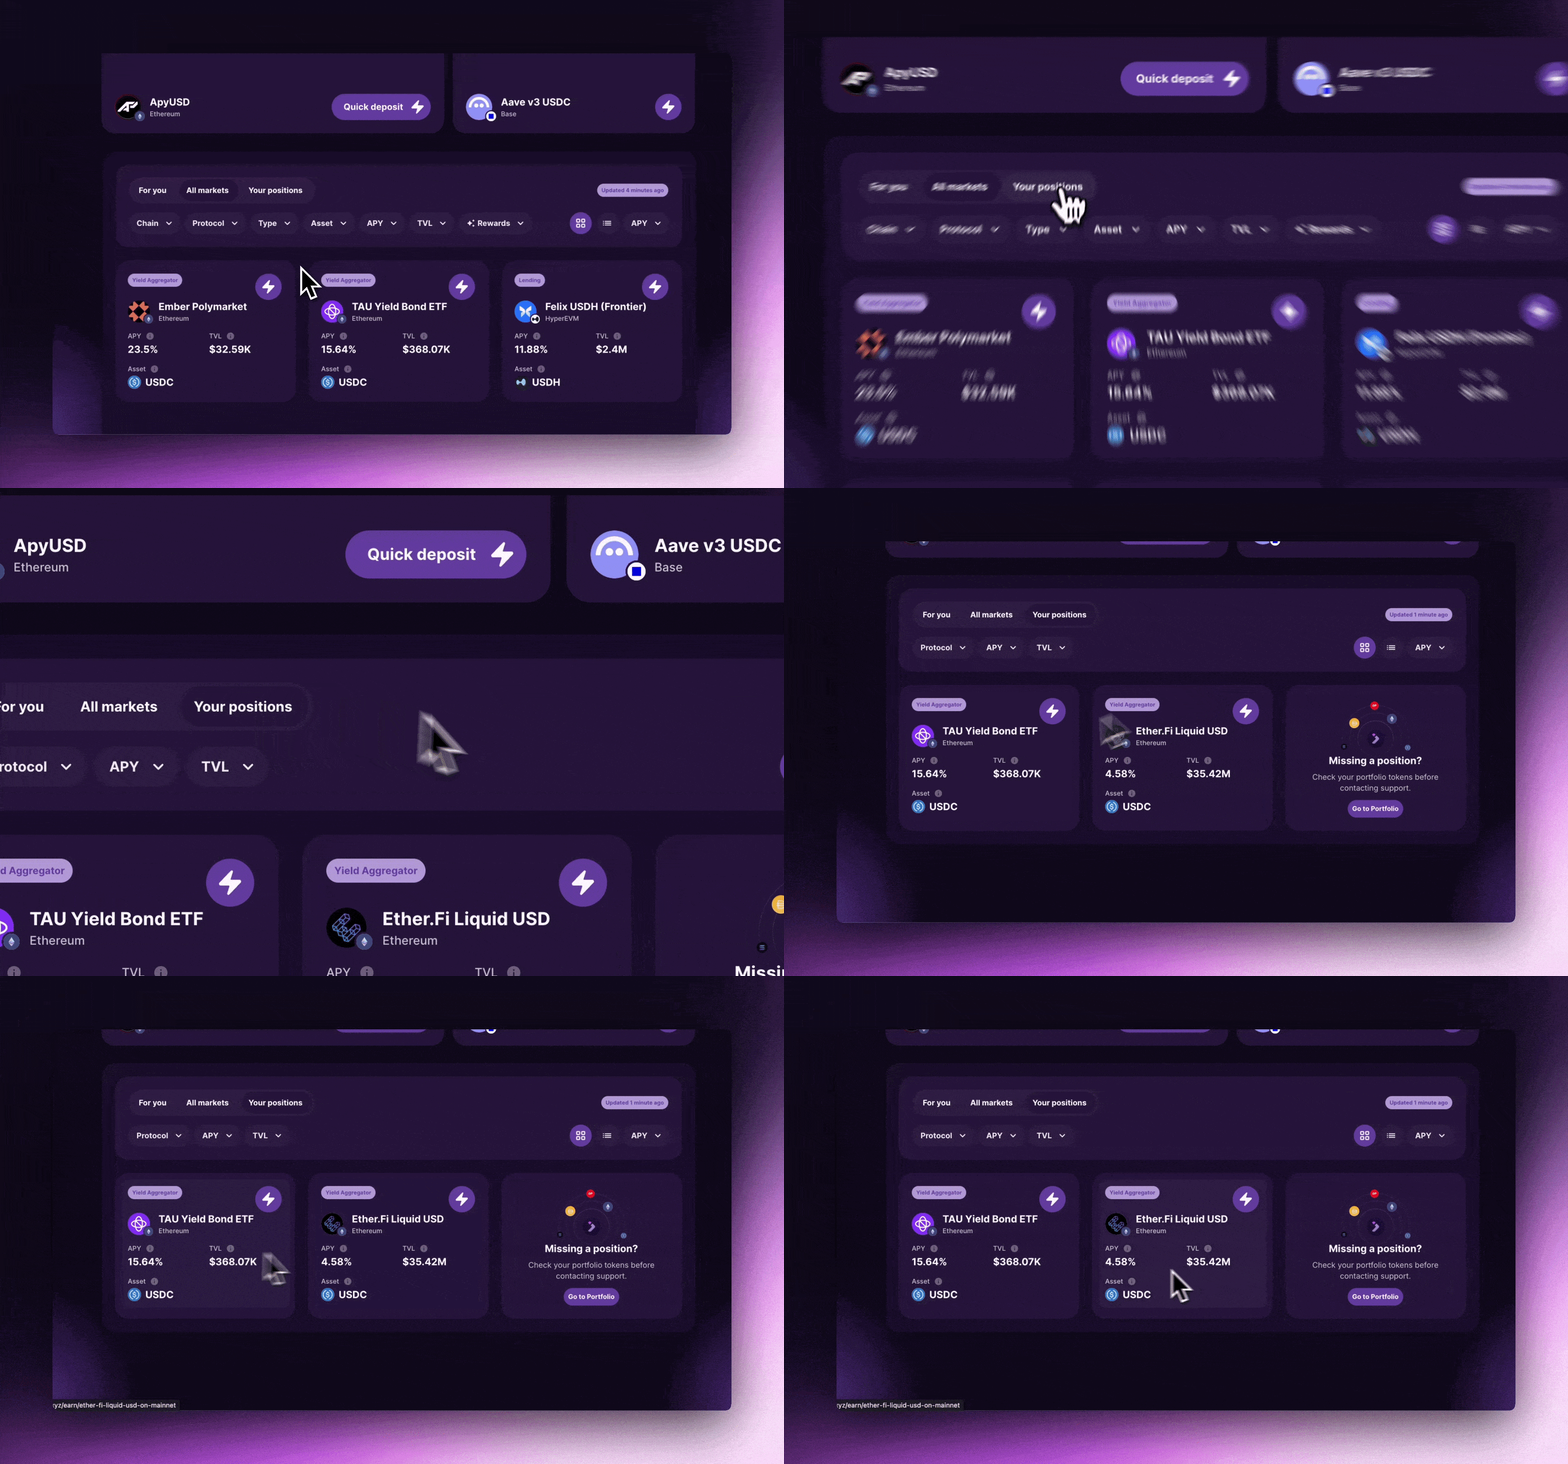
- DeFi Protocols section in your Jumper Portfolio.
8. How to claim Jumper Perks
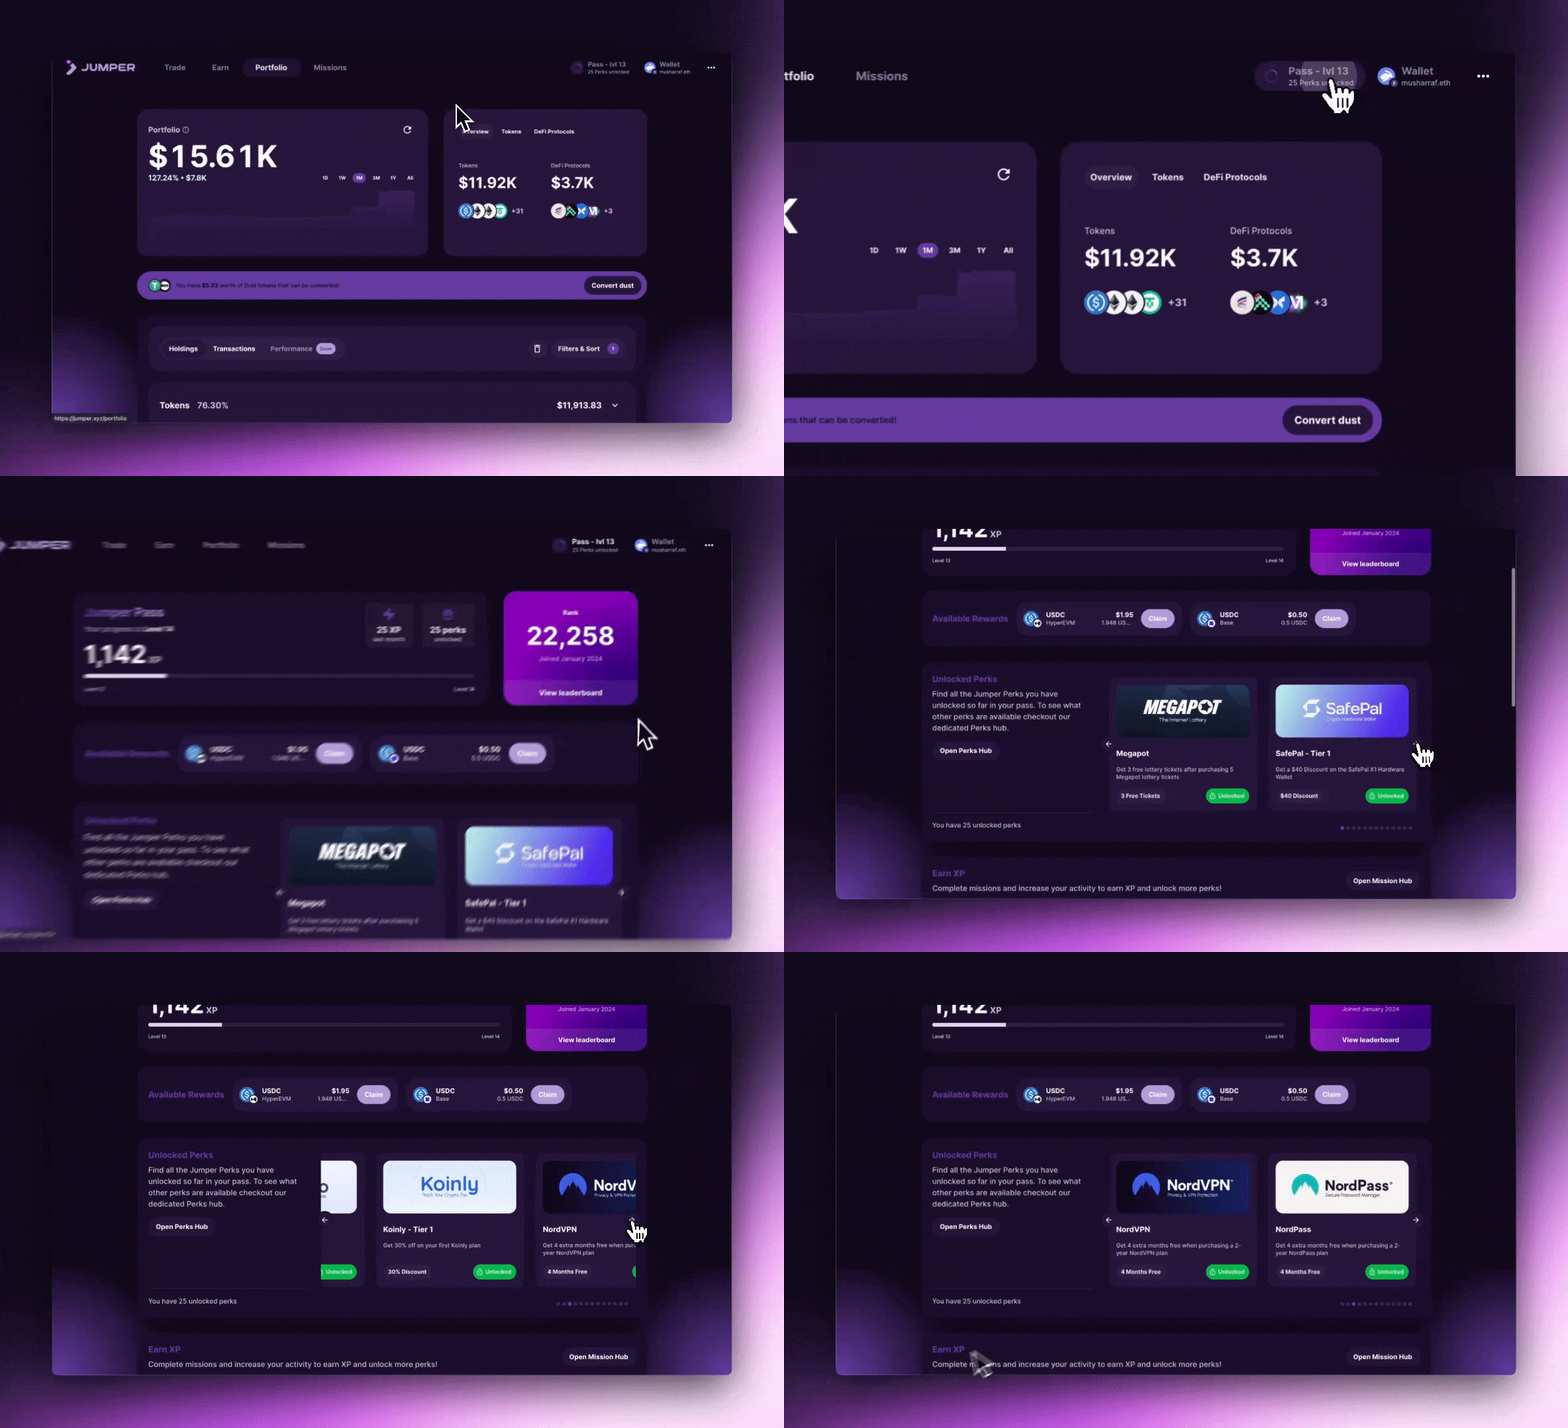
Go to jumper.xyz/profile to see your Jumper Pass profile.
Scroll down to the "Unlocked Perks" section to see your unlocked rewards.
Find a perk you’d like to claim and verify detail to start the claim process.
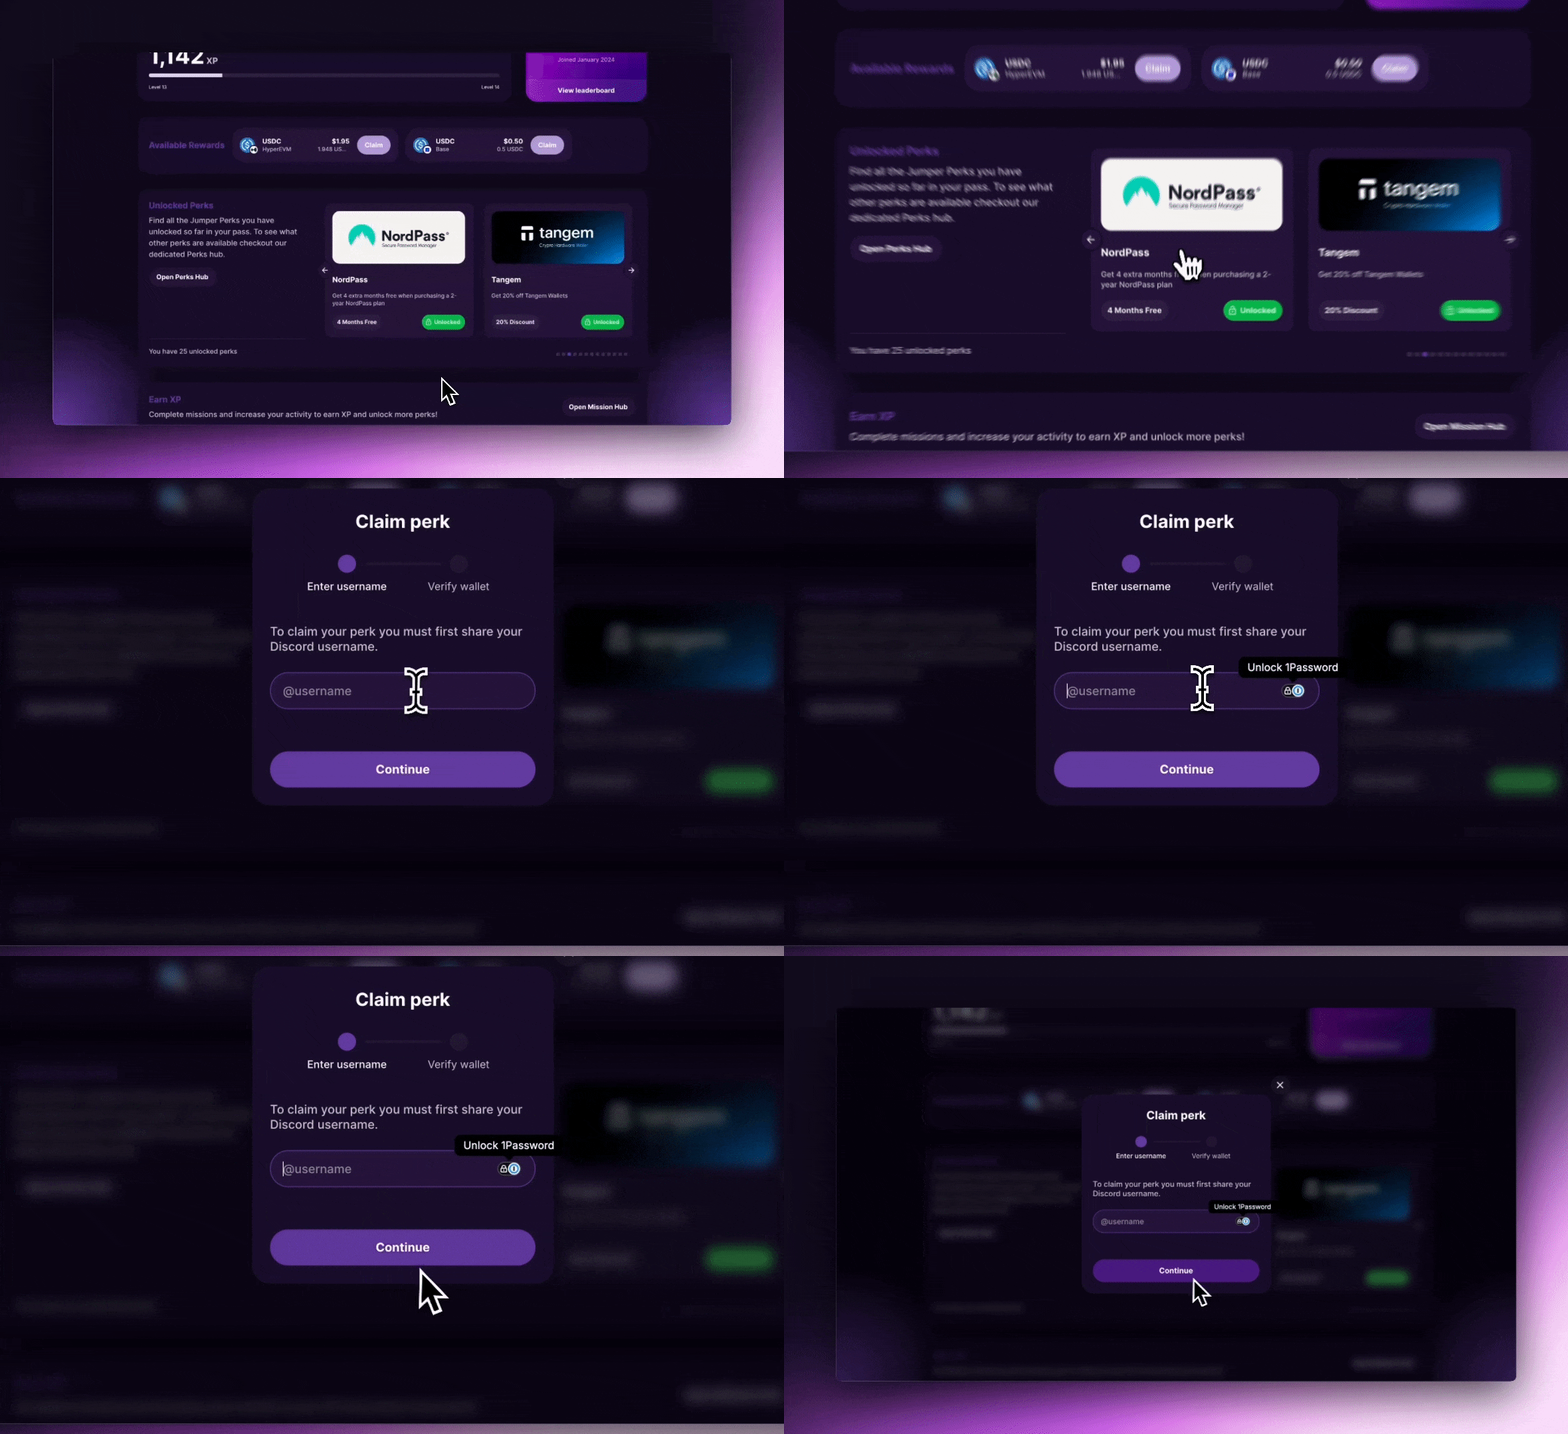
Redeem. After verification, you'll land on the perk's claim page with instructions on how to claim it.