> ## Documentation Index
> Fetch the complete documentation index at: https://docs.jumper.xyz/llms.txt
> Use this file to discover all available pages before exploring further.
# FAQ
> Frequently asked questions about Jumper
Frequently asked questions about Jumper
***
## 1. How to swap tokens on Jumper
Jumper lets you swap tokens on the same chain or across different chains — for example, USDC on Arbitrum to SOL. The only requirement is that liquidity exists on a supported bridge or DEX for your token pair.
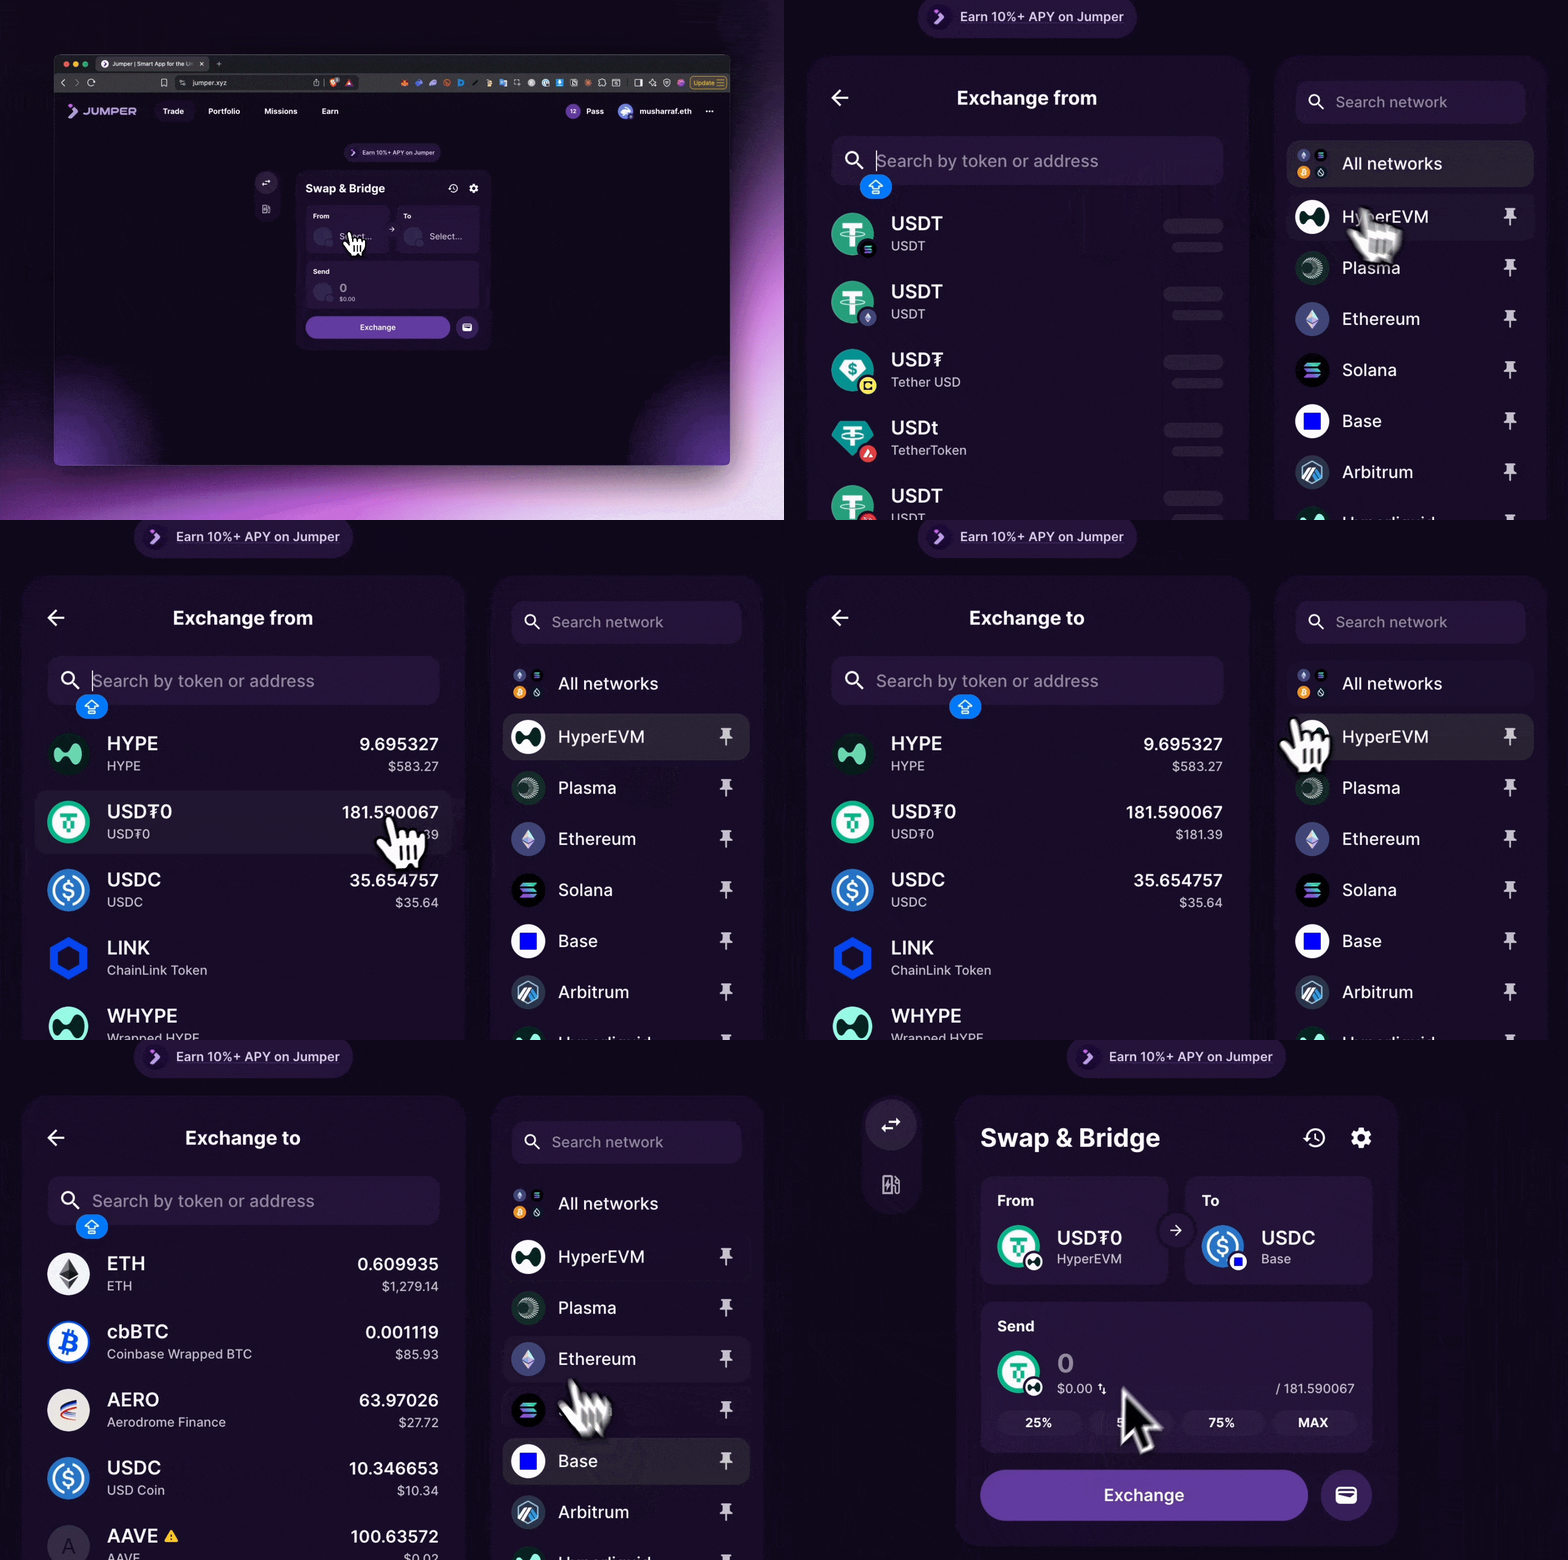
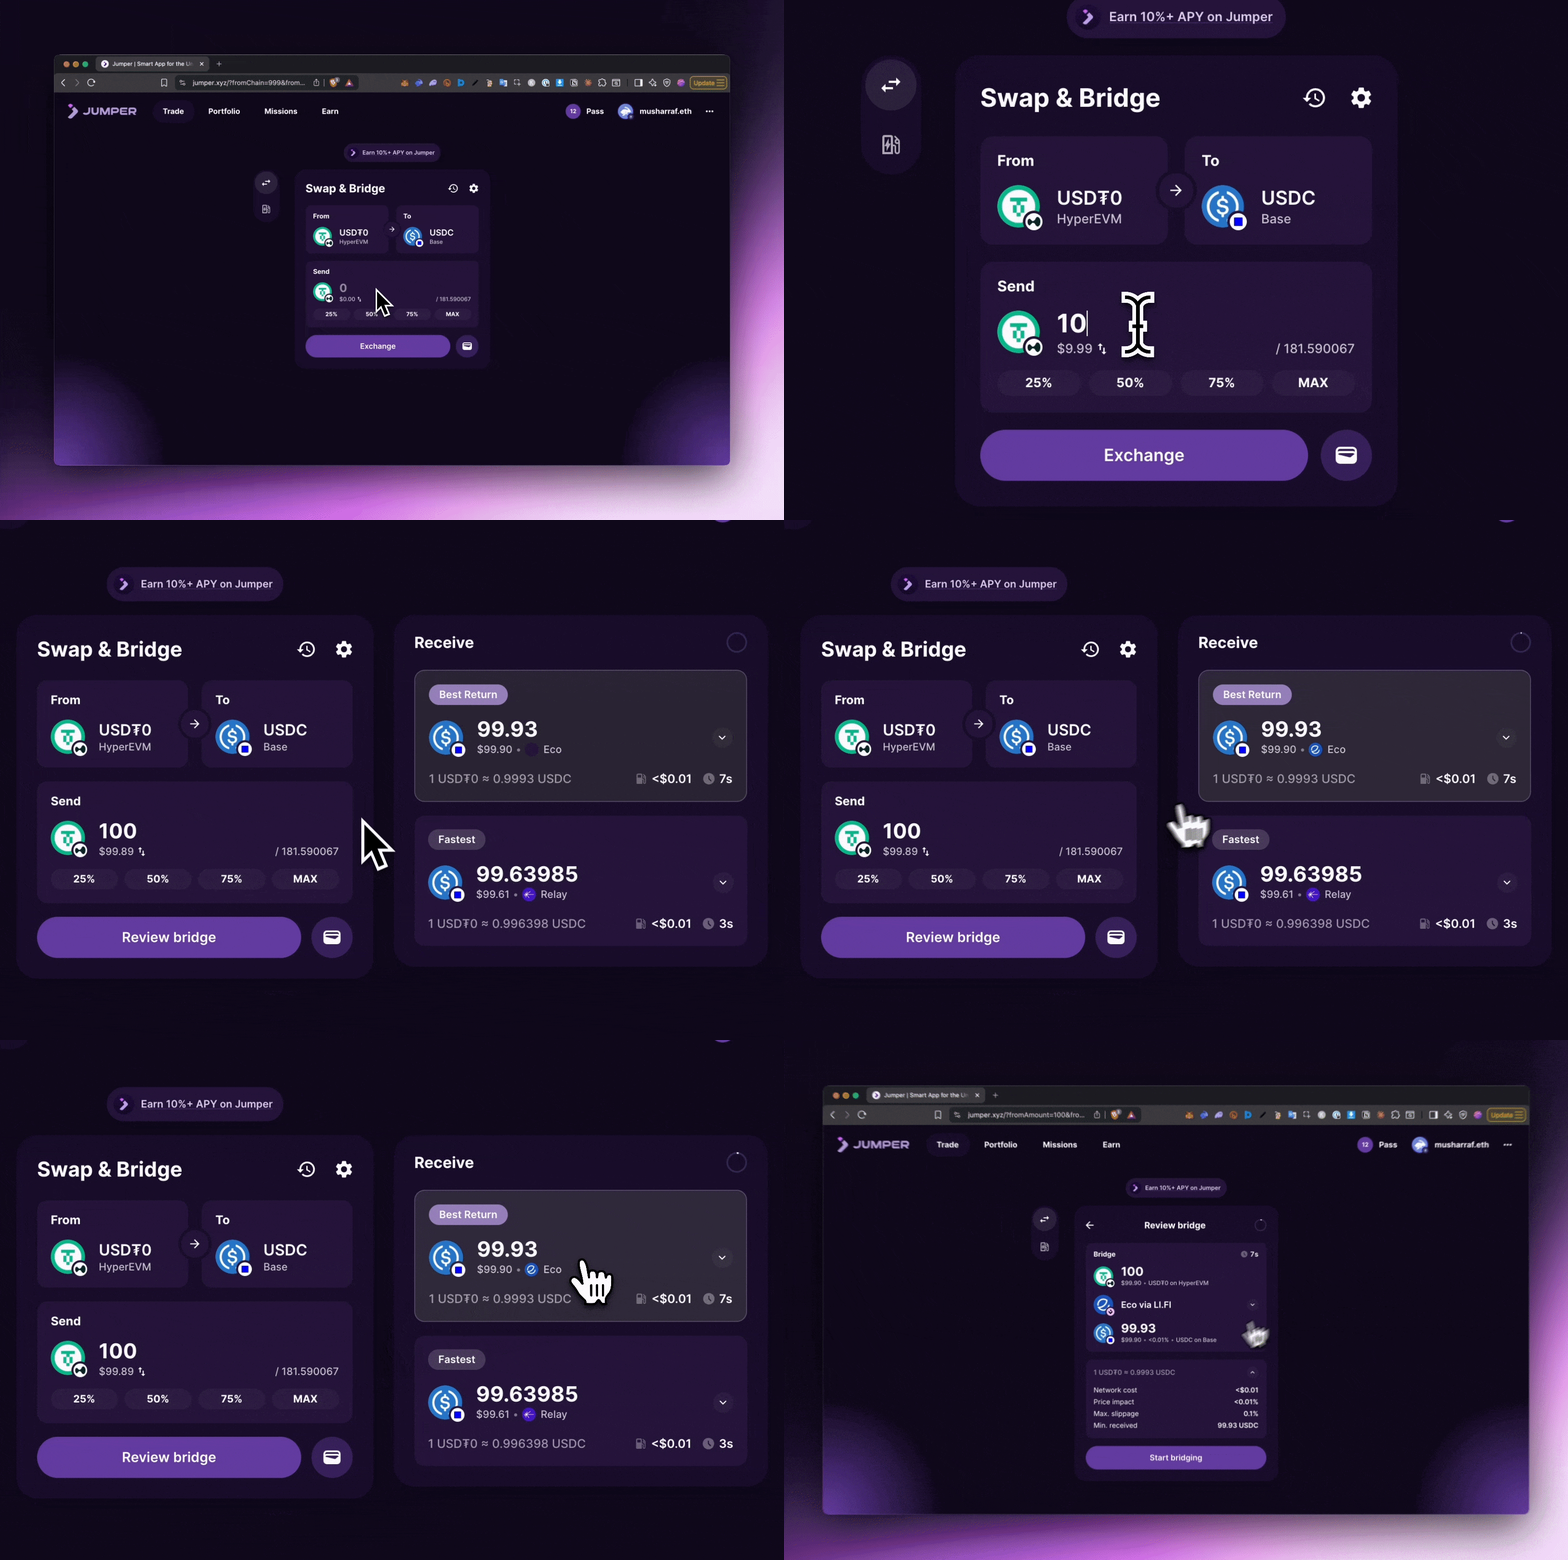 When the swap finishes, you'll see a success message. Click **Done** or **See Details** to review.
***
## 2. How to change the receiving address
By default, Jumper sends funds to the wallet that started the swap. If you're bridging to a non-EVM chain, you'll need to paste an address that supports that network.
To send funds to a different wallet, click the **wallet icon** next to the Exchange button.
When the swap finishes, you'll see a success message. Click **Done** or **See Details** to review.
***
## 2. How to change the receiving address
By default, Jumper sends funds to the wallet that started the swap. If you're bridging to a non-EVM chain, you'll need to paste an address that supports that network.
To send funds to a different wallet, click the **wallet icon** next to the Exchange button.
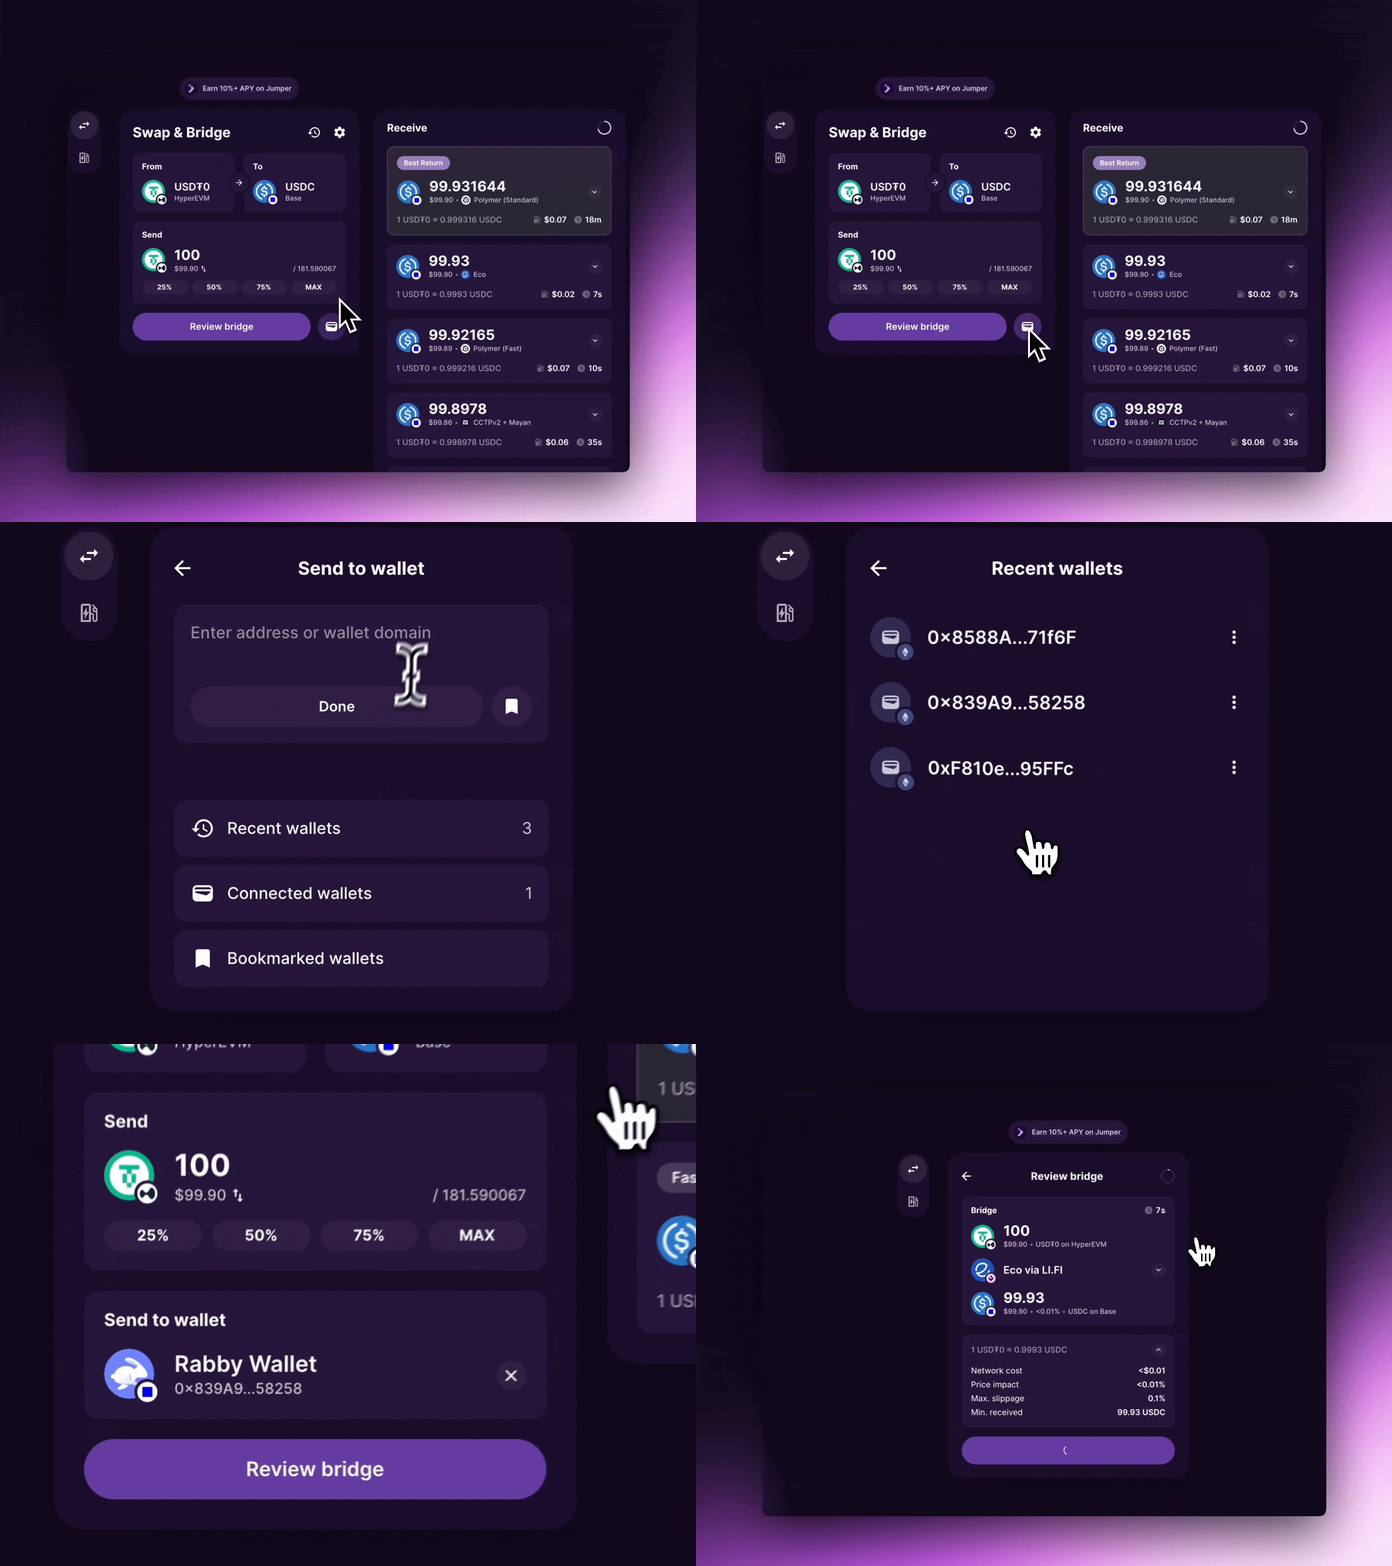 Your swap summary will now show the updated destination wallet.
***
## 3. How to find your transaction details
After your transaction completes, click the **link button** in the swap overview to open Jumper Scan with your transaction details.
Your swap summary will now show the updated destination wallet.
***
## 3. How to find your transaction details
After your transaction completes, click the **link button** in the swap overview to open Jumper Scan with your transaction details.
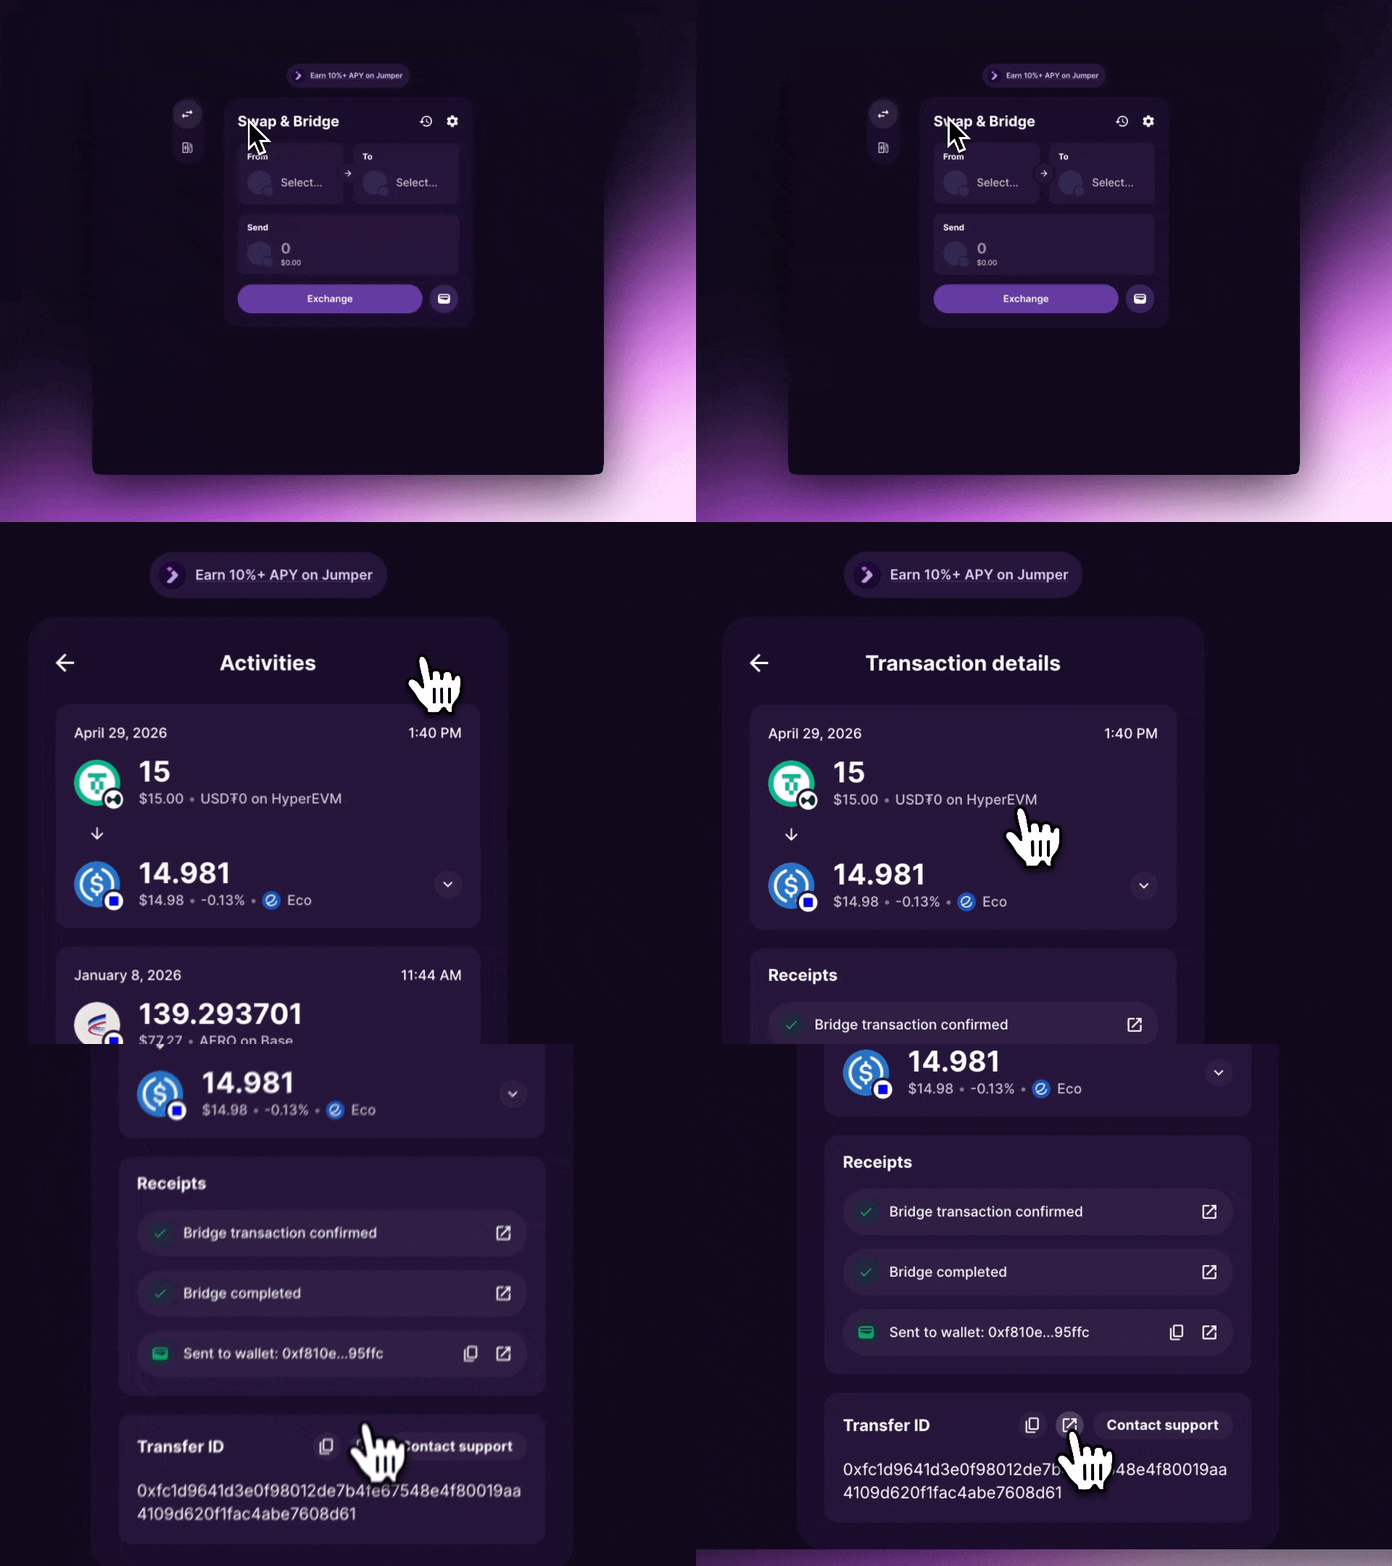 To see all your activity, go to [jumper.xyz/scan](http://jumper.xyz/scan) and paste your wallet address. This shows your full transaction history.
Click any transaction to see the full breakdown: transaction hash, bridge used, gas fees, tokens sent and received, source and destination addresses, and blockchain explorer links.
## 4. How to reach user support on Jumper
To see all your activity, go to [jumper.xyz/scan](http://jumper.xyz/scan) and paste your wallet address. This shows your full transaction history.
Click any transaction to see the full breakdown: transaction hash, bridge used, gas fees, tokens sent and received, source and destination addresses, and blockchain explorer links.
## 4. How to reach user support on Jumper
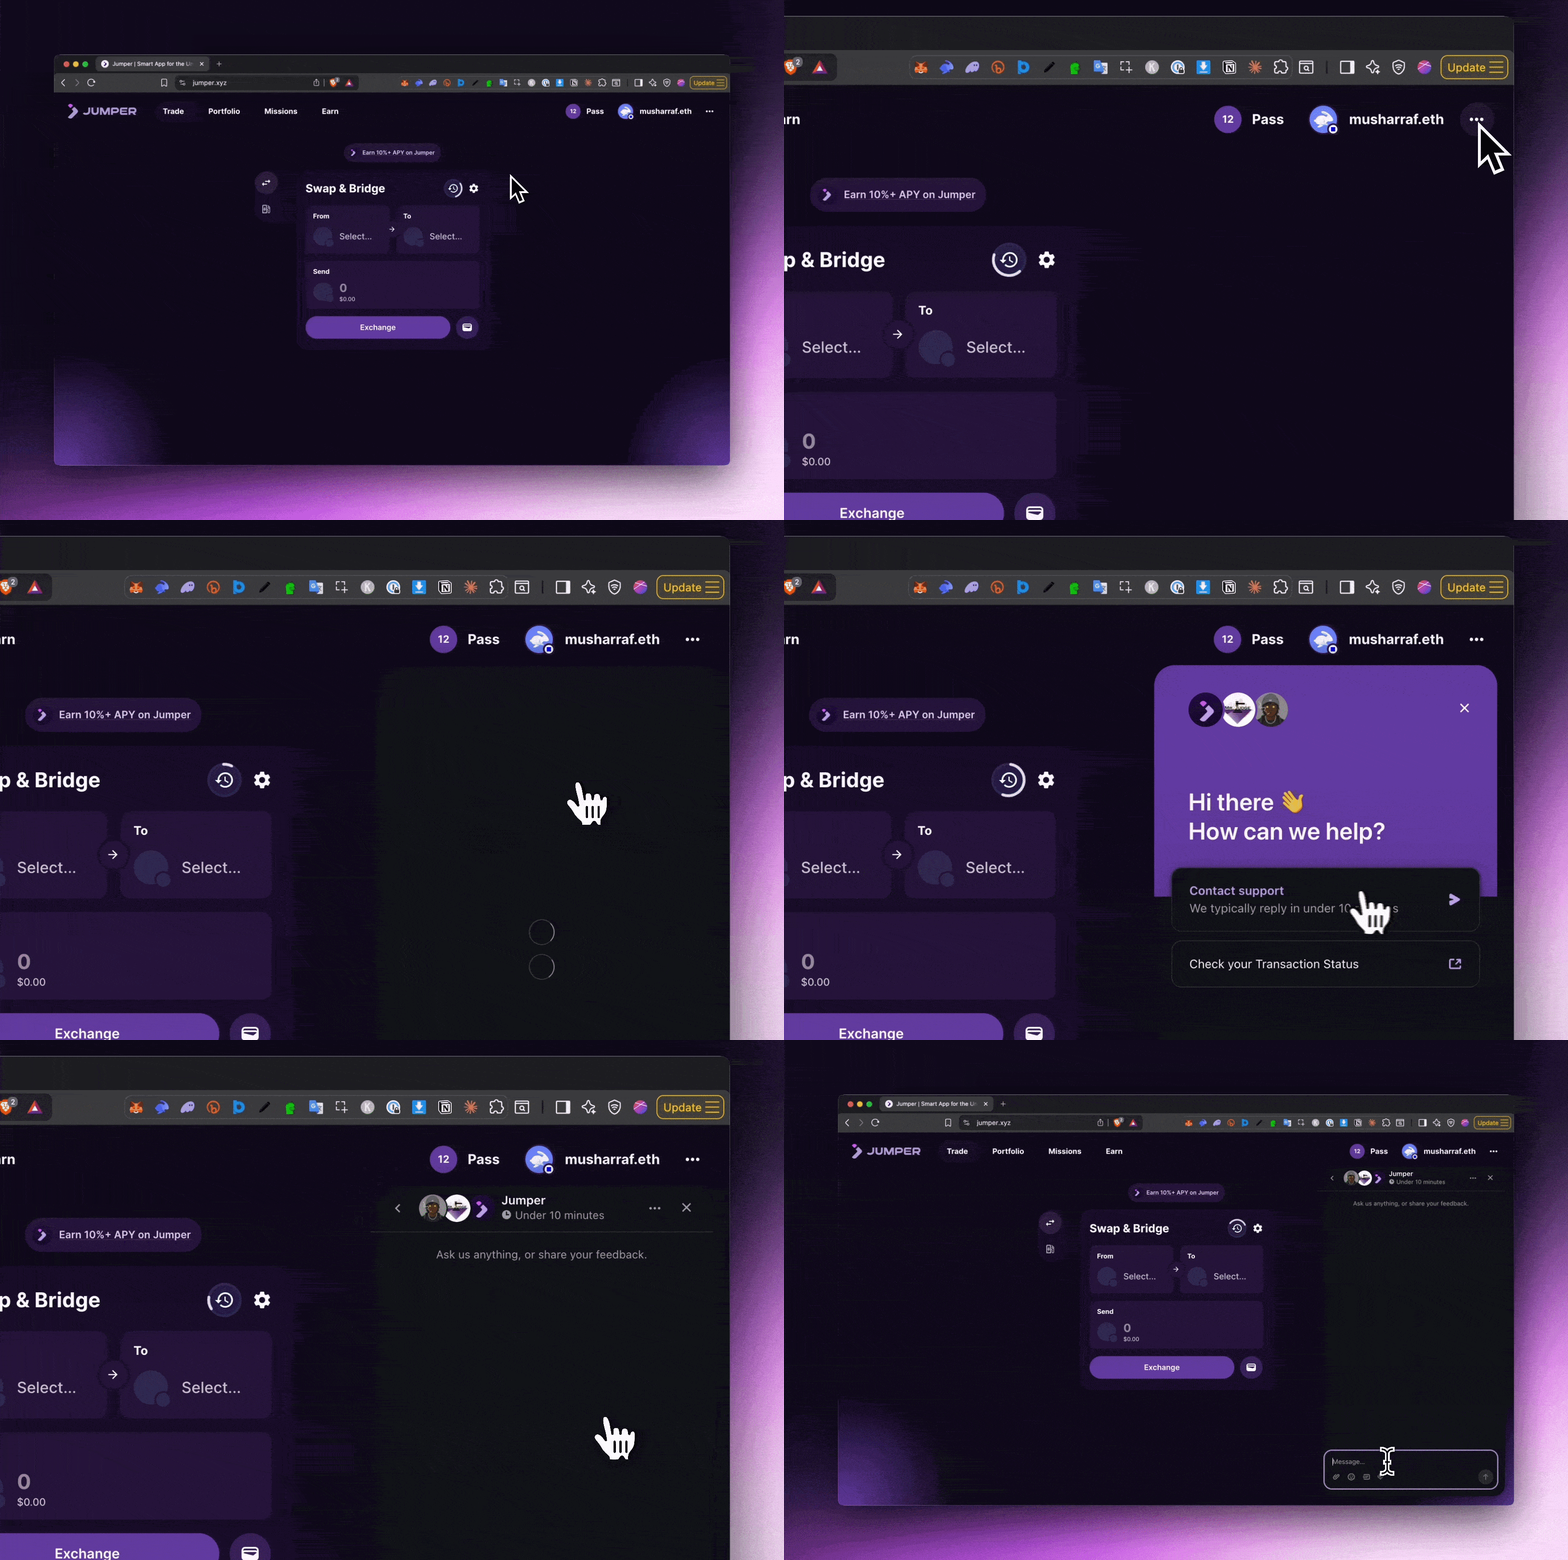 * Your wallet address
* Origin and destination chain,
* Transaction hash or ID
* A brief description of the issue (screenshots help).
The more detail you give upfront, the faster we can help.
***
## 5. How to deposit into a yield opportunity on Jumper Earn
Go to [jumper.xyz/earn](http://jumper.xyz/earn) and explore available yield opportunities. Jumper Earn recommends opportunities based on your current assets and existing DeFi positions.
* Your wallet address
* Origin and destination chain,
* Transaction hash or ID
* A brief description of the issue (screenshots help).
The more detail you give upfront, the faster we can help.
***
## 5. How to deposit into a yield opportunity on Jumper Earn
Go to [jumper.xyz/earn](http://jumper.xyz/earn) and explore available yield opportunities. Jumper Earn recommends opportunities based on your current assets and existing DeFi positions.
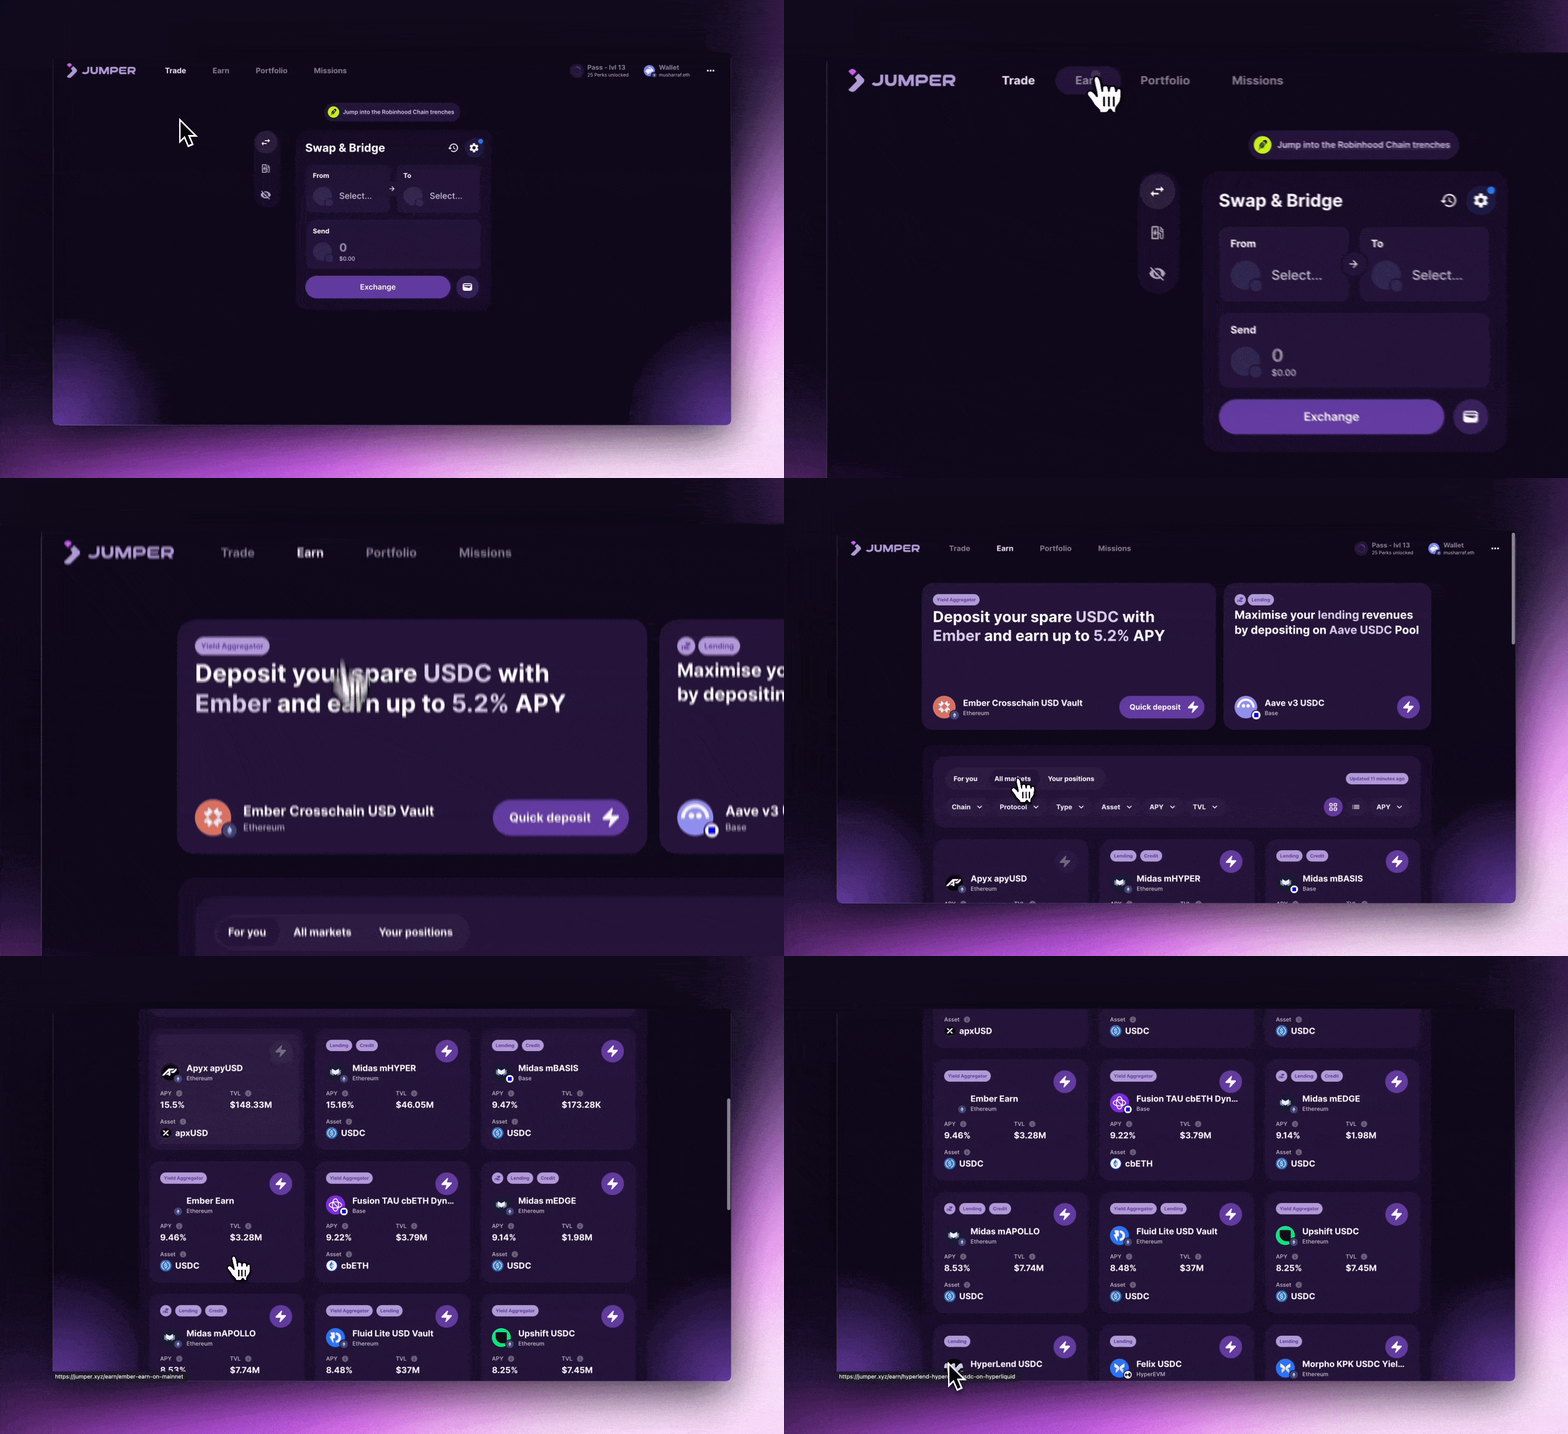 Click an opportunity to see supported assets, APY, TVL, the contract address, and anything else you need before depositing.
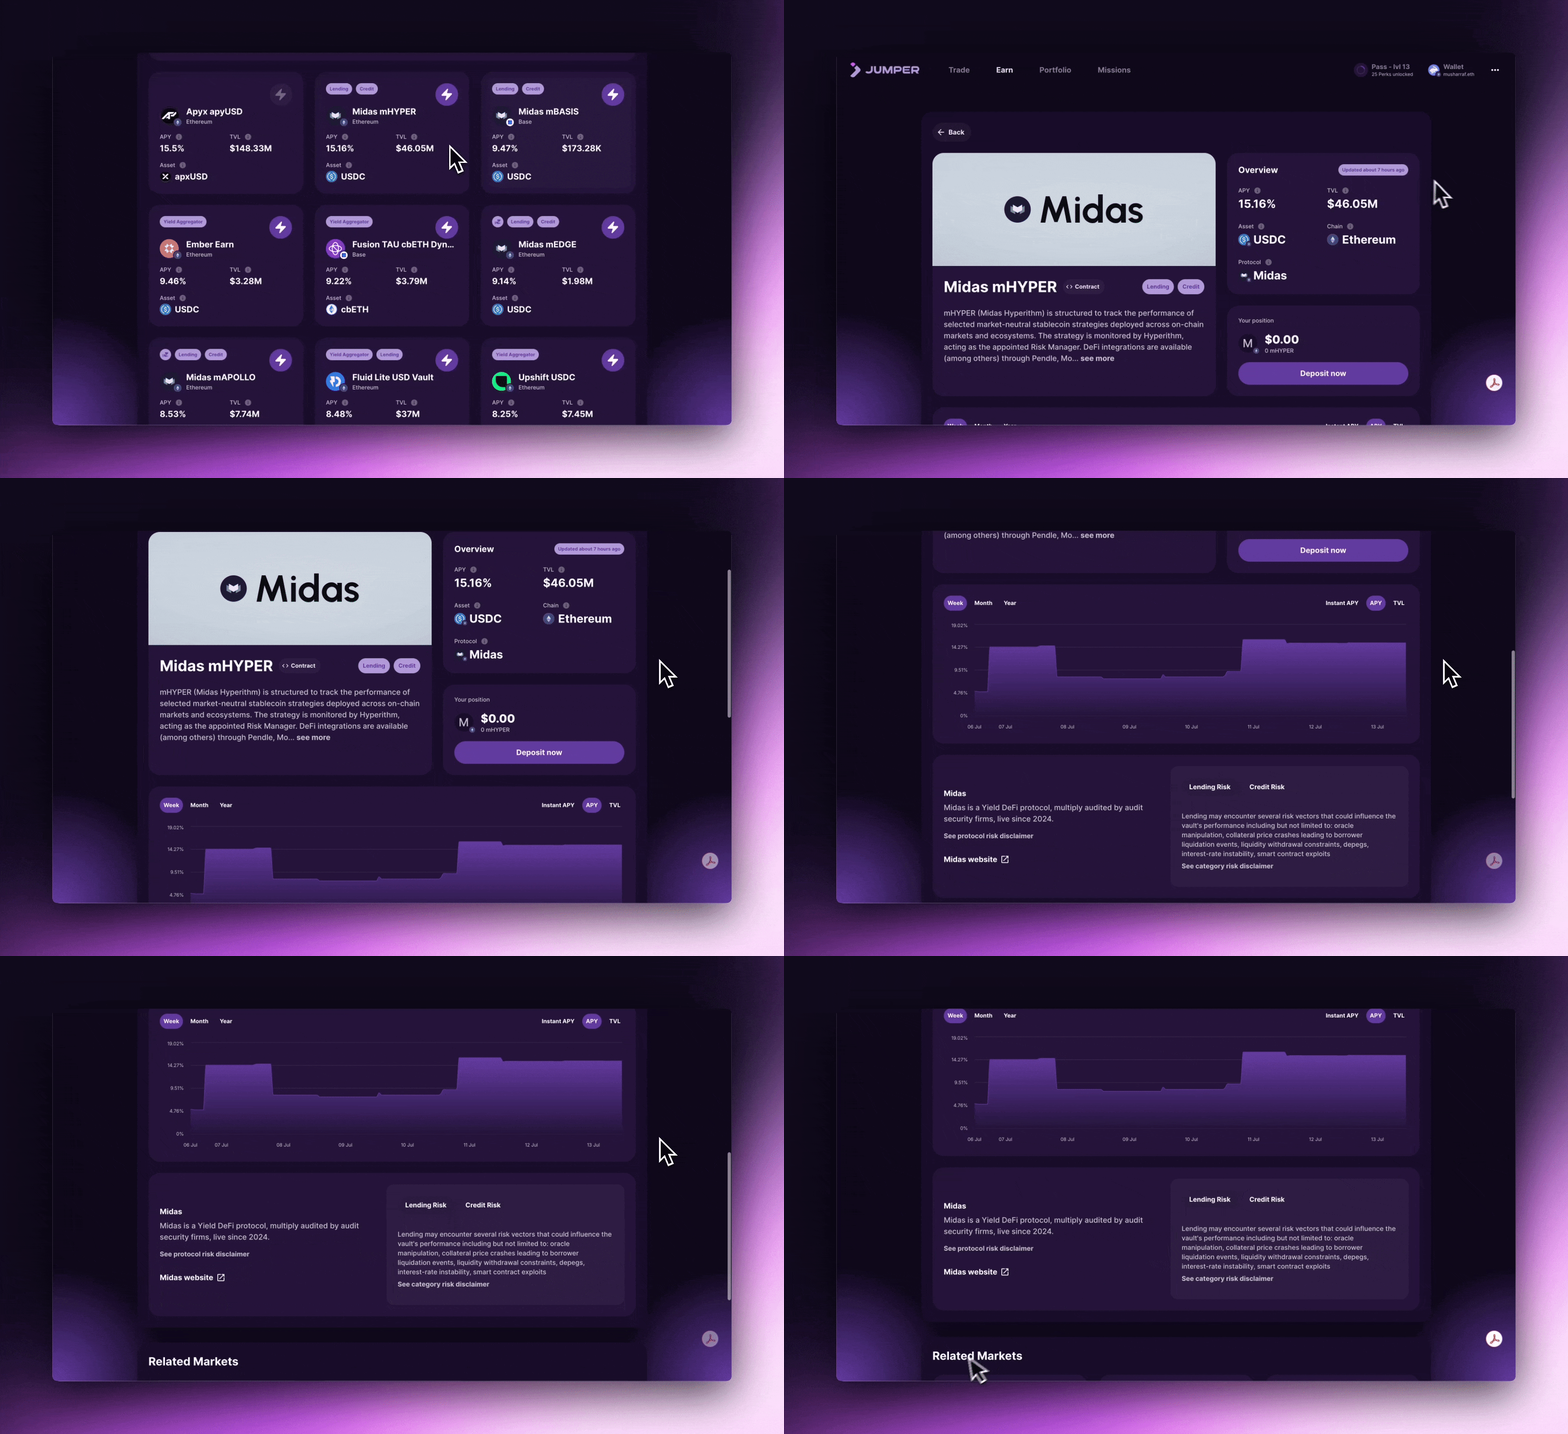 Use **Quick Deposit** from the overview page. You can deposit from any supported asset on any supported chain — Jumper handles the swaps and bridging automatically.
 ***
## 6. How to manage DeFi positions on Jumper
**Where to find your positions**
You can view active positions in two places:
1. **Your Positions** section on the Earn page
***
## 6. How to manage DeFi positions on Jumper
**Where to find your positions**
You can view active positions in two places:
1. **Your Positions** section on the Earn page
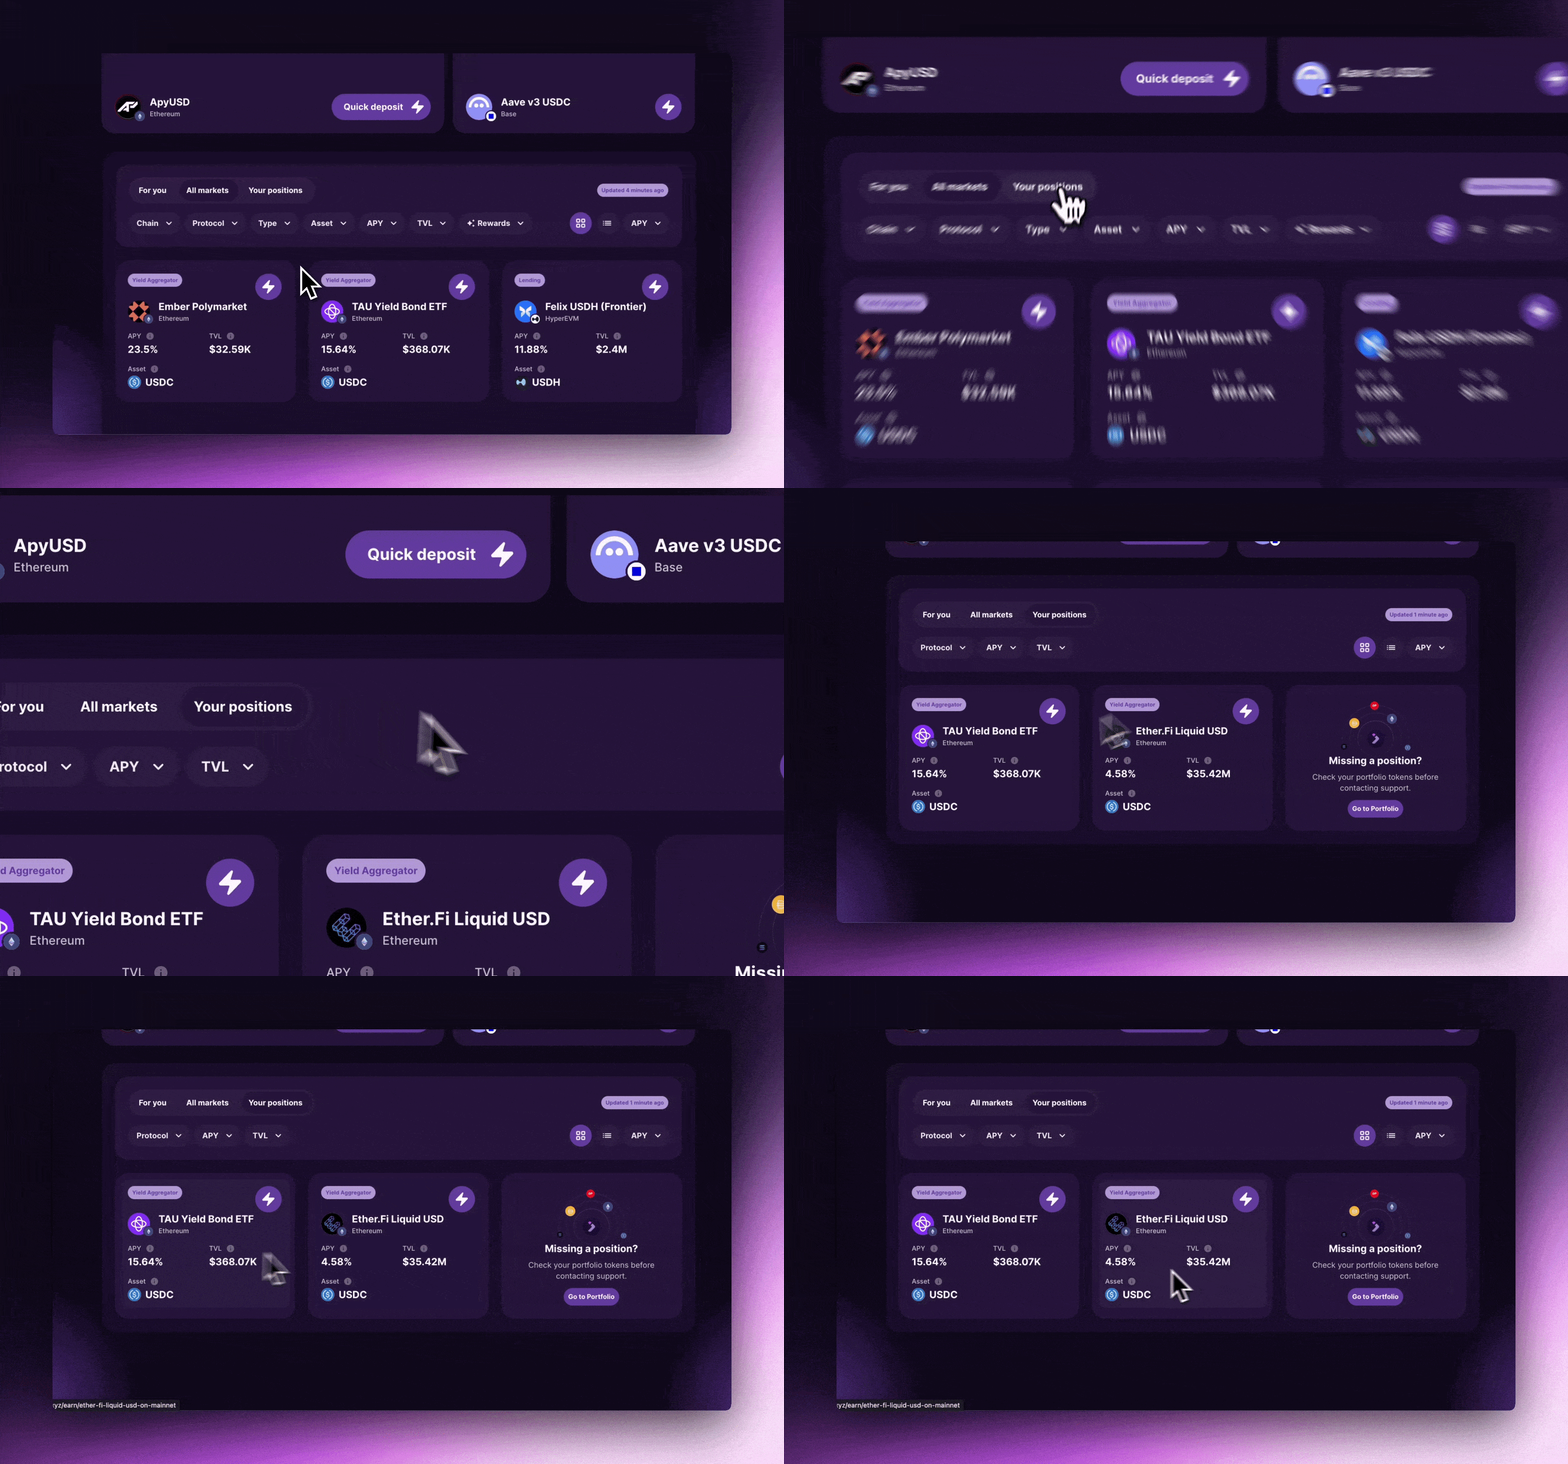 2. **DeFi Protocols** section in your Jumper Portfolio.
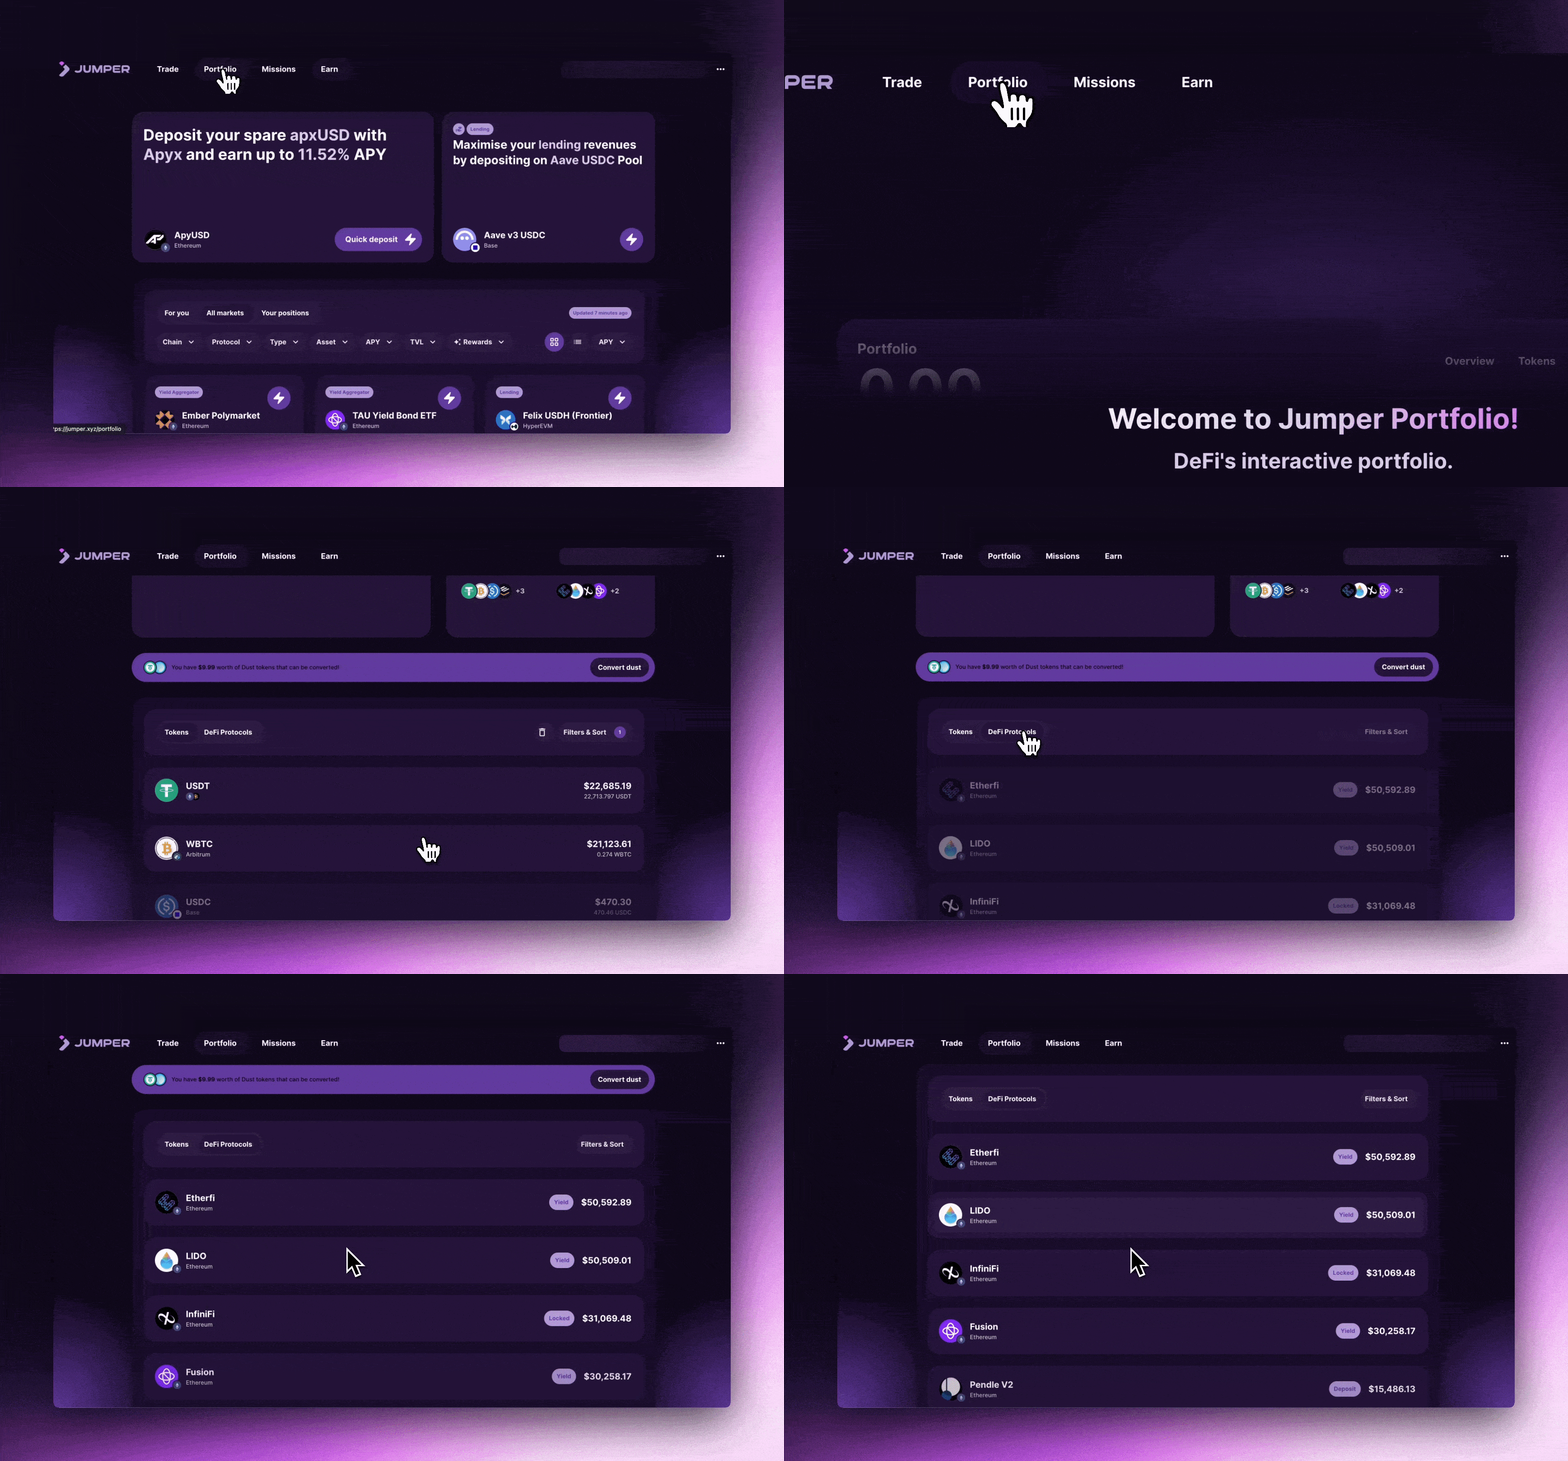 Note: You can also use Jumper Portfolio to withdraw from or deposit more into existing DeFi positions.
***
## 8. How to claim Jumper Perks
Note: You can also use Jumper Portfolio to withdraw from or deposit more into existing DeFi positions.
***
## 8. How to claim Jumper Perks
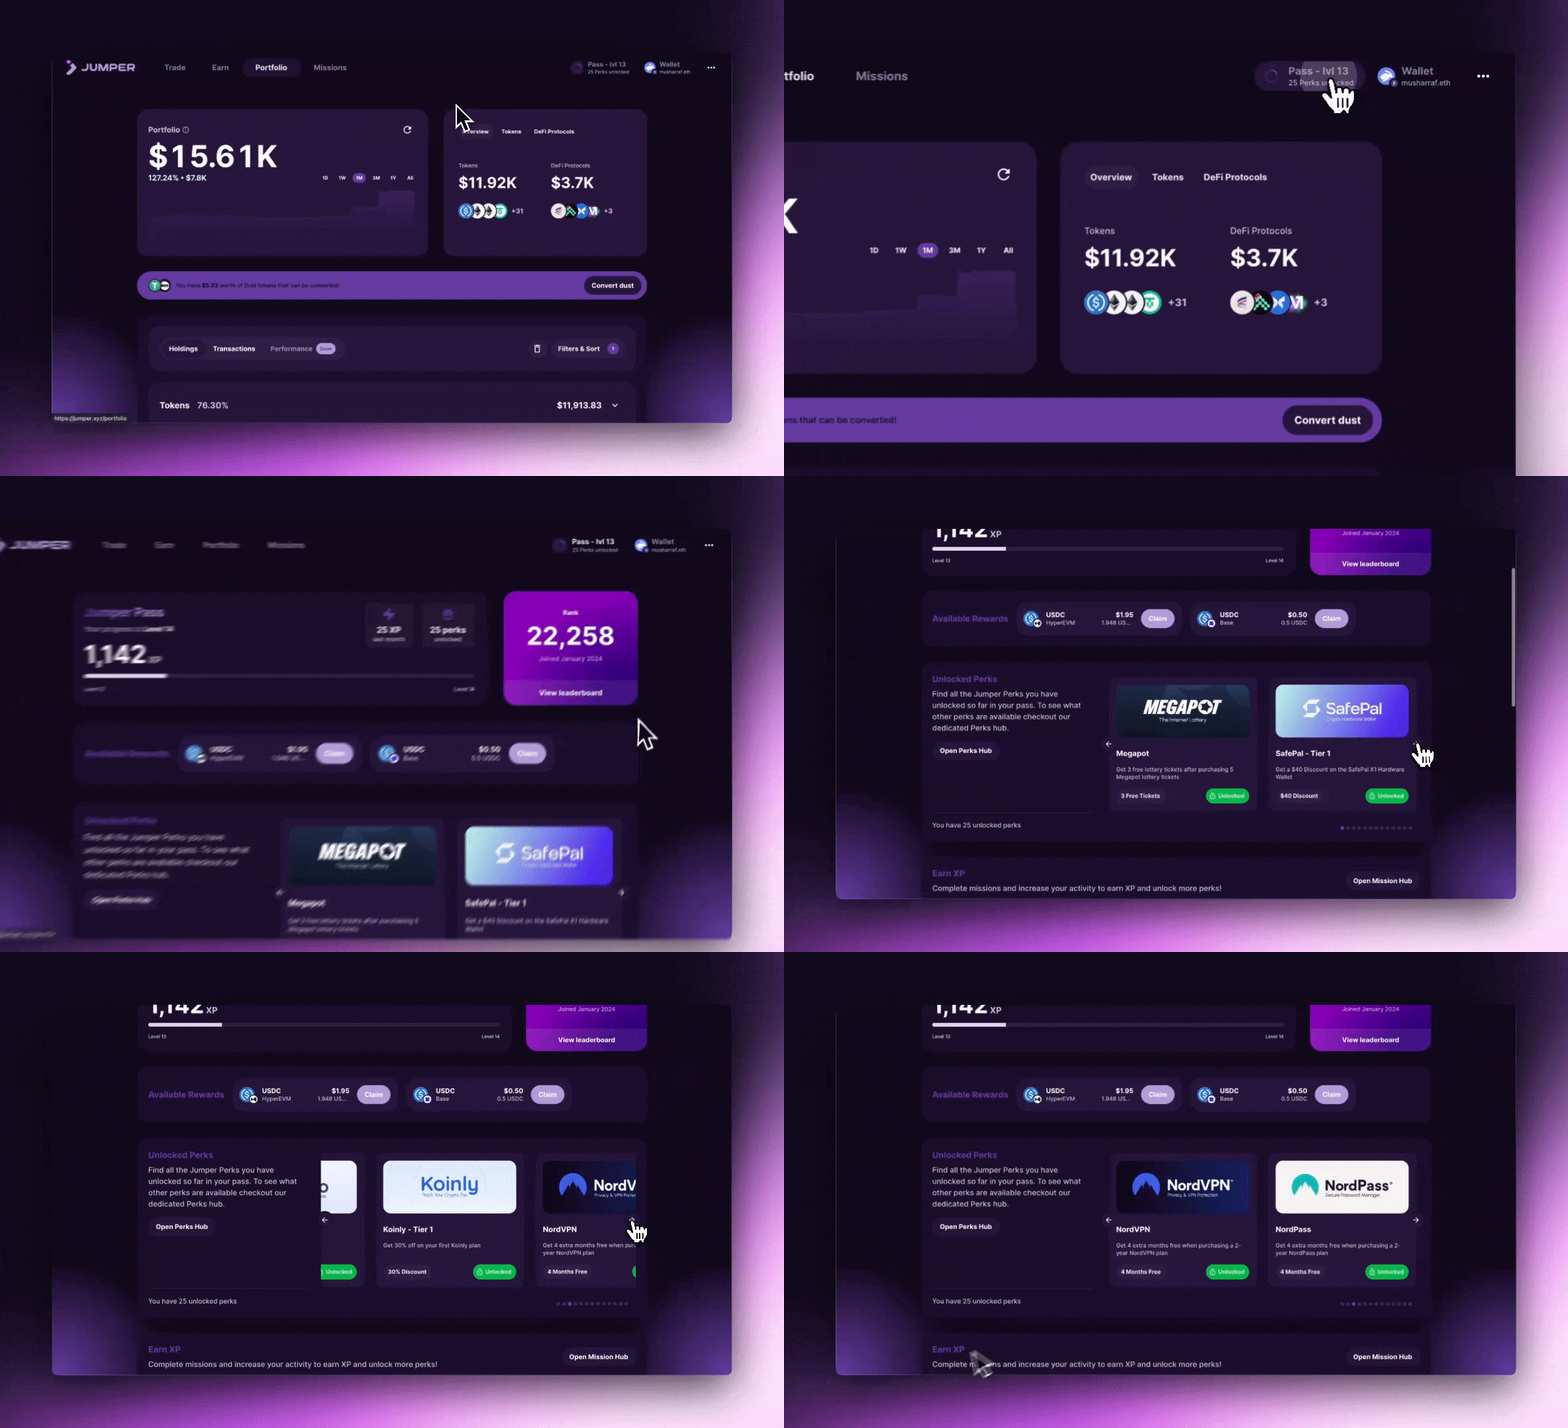
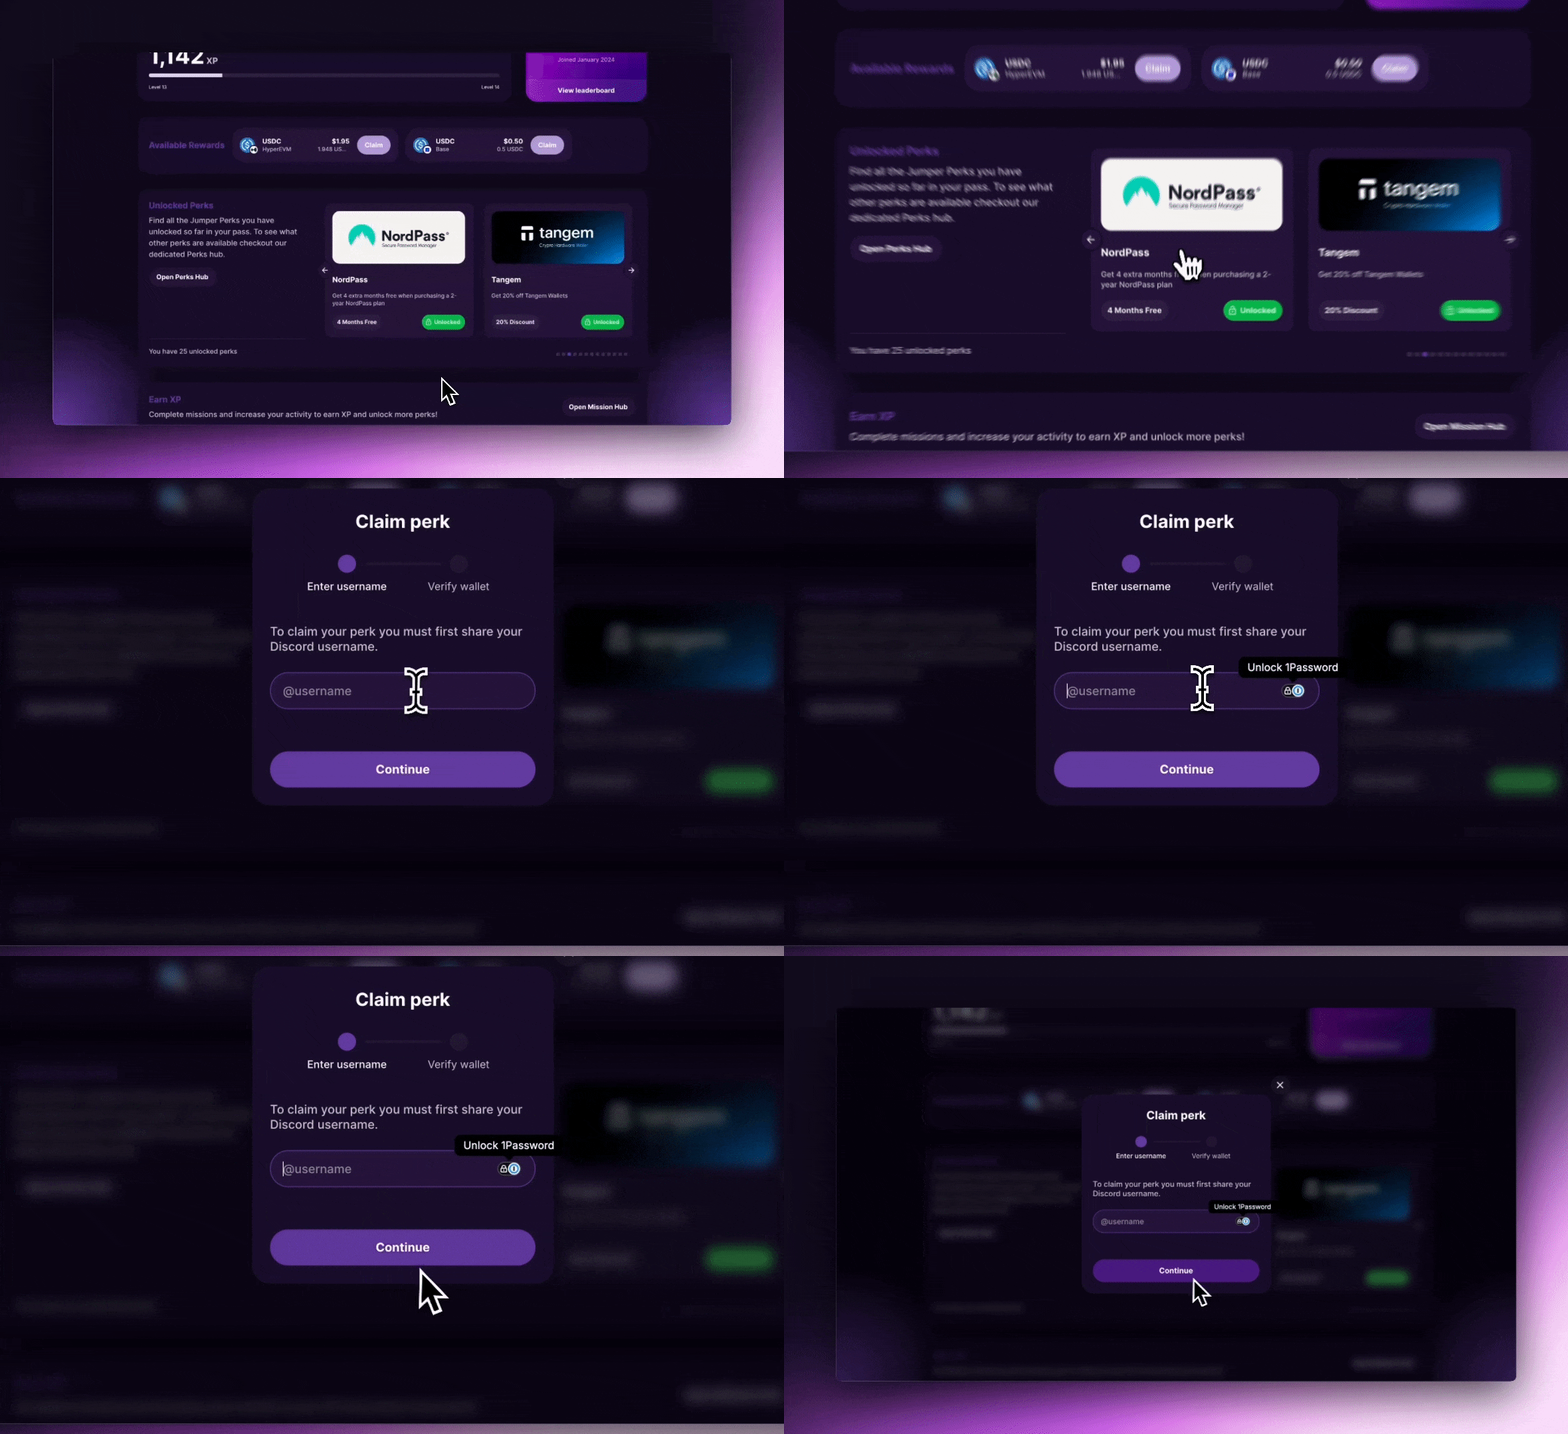 Some perks require joining the Jumper Discord, where claim codes are distributed manually.
***
Some perks require joining the Jumper Discord, where claim codes are distributed manually.
***